Amira gives teachers control over how the platform runs for their own students, separate from the district- and school-level configuration that admins manage. This article walks through the three places teachers manage settings:
- Assessment Settings, configuring accommodations and options for Assess/Evaluar
- Tutor Settings, configuring how students practice in Amira Tutor/Tutora
- Classroom Management, managing your roster and class-level details
Where to find your settings
From the Teacher/Growth Dashboard, look for the gear/settings icon on the left-hand panel. Depending on what your district has enabled, you'll see some combination of Assessment Settings, Tutor Settings, and Classroom Management as separate tabs.
1. Assessment Settings
Walkthrough: Assessment Settings
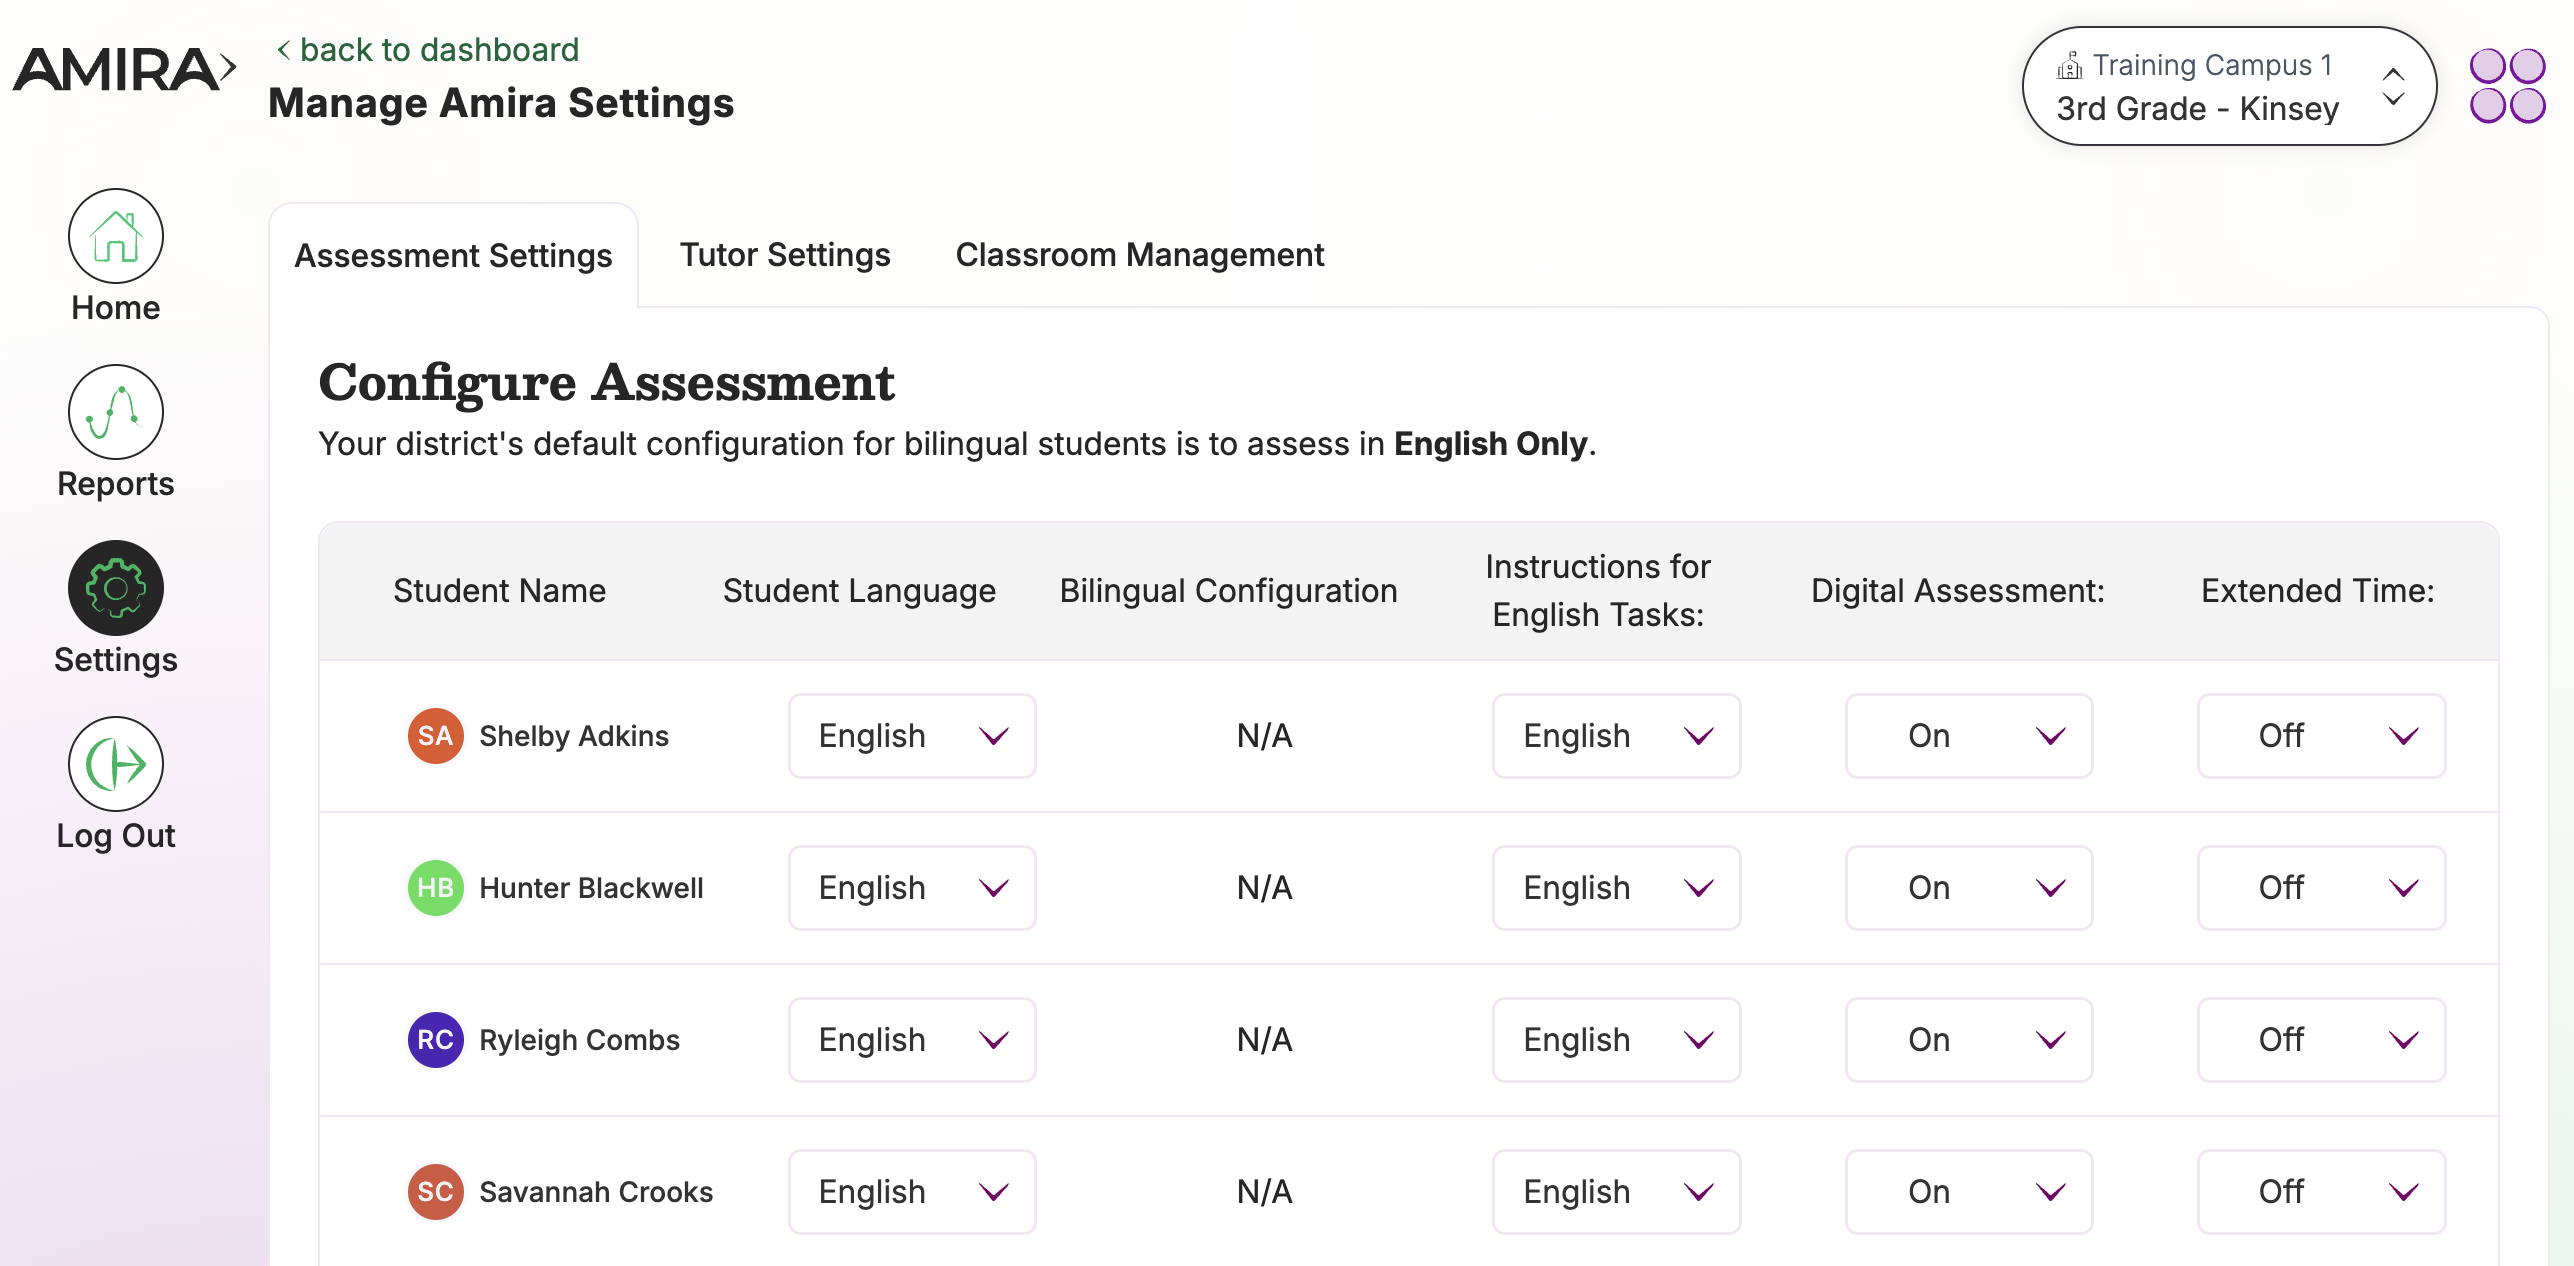
What it's for: Making sure each student's assessment experience is configured correctly before an assessment window opens or an assessment is assigned. Changes made mid-window will not apply to the student's assessment.
What you can configure:
| Setting | What it controls |
|---|---|
| Student Language | English or Bilingual |
| Bilingual Configuration | District Default, English, Spanish, or Both |
| Instructions for English Tasks | English, Spanish |
| Digital Assessment | Nonverbal assessment, paper/pencil assessment |
| Extended Time | On, Off |
Click Save at the bottom of the page after making adjustments.
⚠️ If a student already has an assessment assigned: Unassign it first, update the setting, then reassign. Changing settings on an in-progress or already-assigned assessment will not apply.
Best practice: Review Assessment Settings for your whole class at the start of each testing window to ensure each student receives the right assessment experience.
Note: Your district may have settings that disable teachers from editing assessment settings. If you are unable to edit settings, check with your school administrator.
2. Tutor Settings
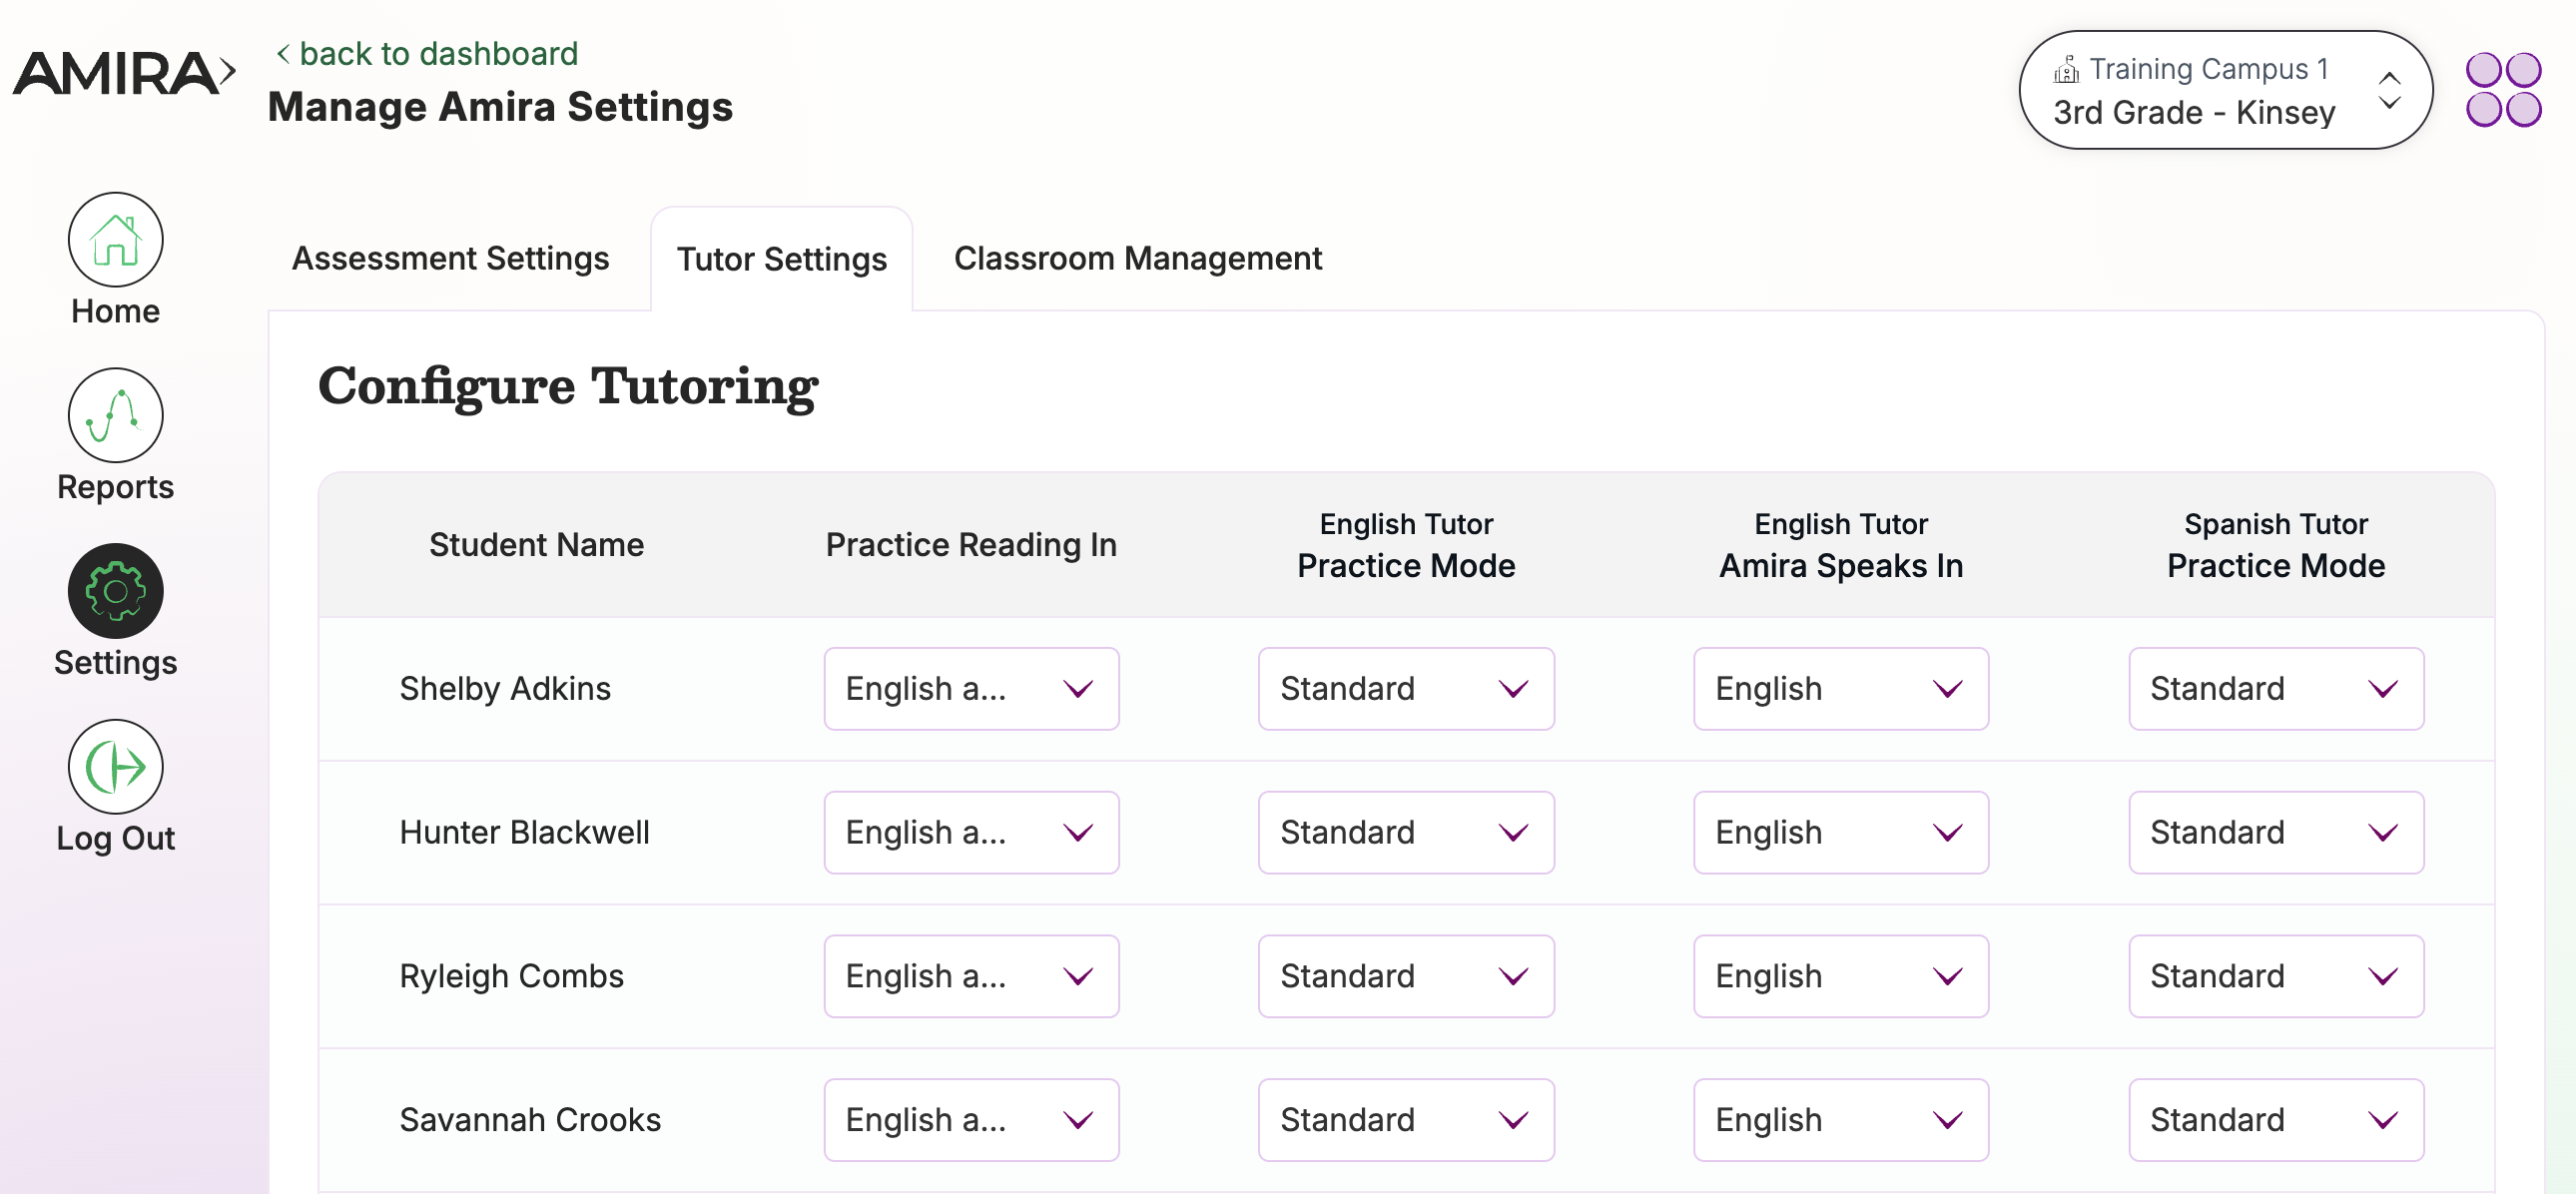
What it's for: Making sure students' Amira Tutor/Tutora practice sessions are configured correctly. Unlike Assessment Settings, Tutor Settings can generally be adjusted anytime without the same "unassign first" requirement, since Tutor is ongoing practice rather than a single scored event.
What you can configure:
- Language(s) student will read in
- Amira's language for tutoring
- Practice mode (standard or Early Reader Skills Scaffold)
Best practice: Revisit Tutor Settings at the start of the year and any time a new student joins your roster, this is one of the most commonly missed steps when a new student doesn't seem to be getting age/skill-appropriate content.
3. Classroom Management
What it's for: This is where teachers locate Student Login Cards, edit students' usernames and passwords, and, if your administration has granted the permission, edit classroom details. You'll find it under Settings → Classroom Management.
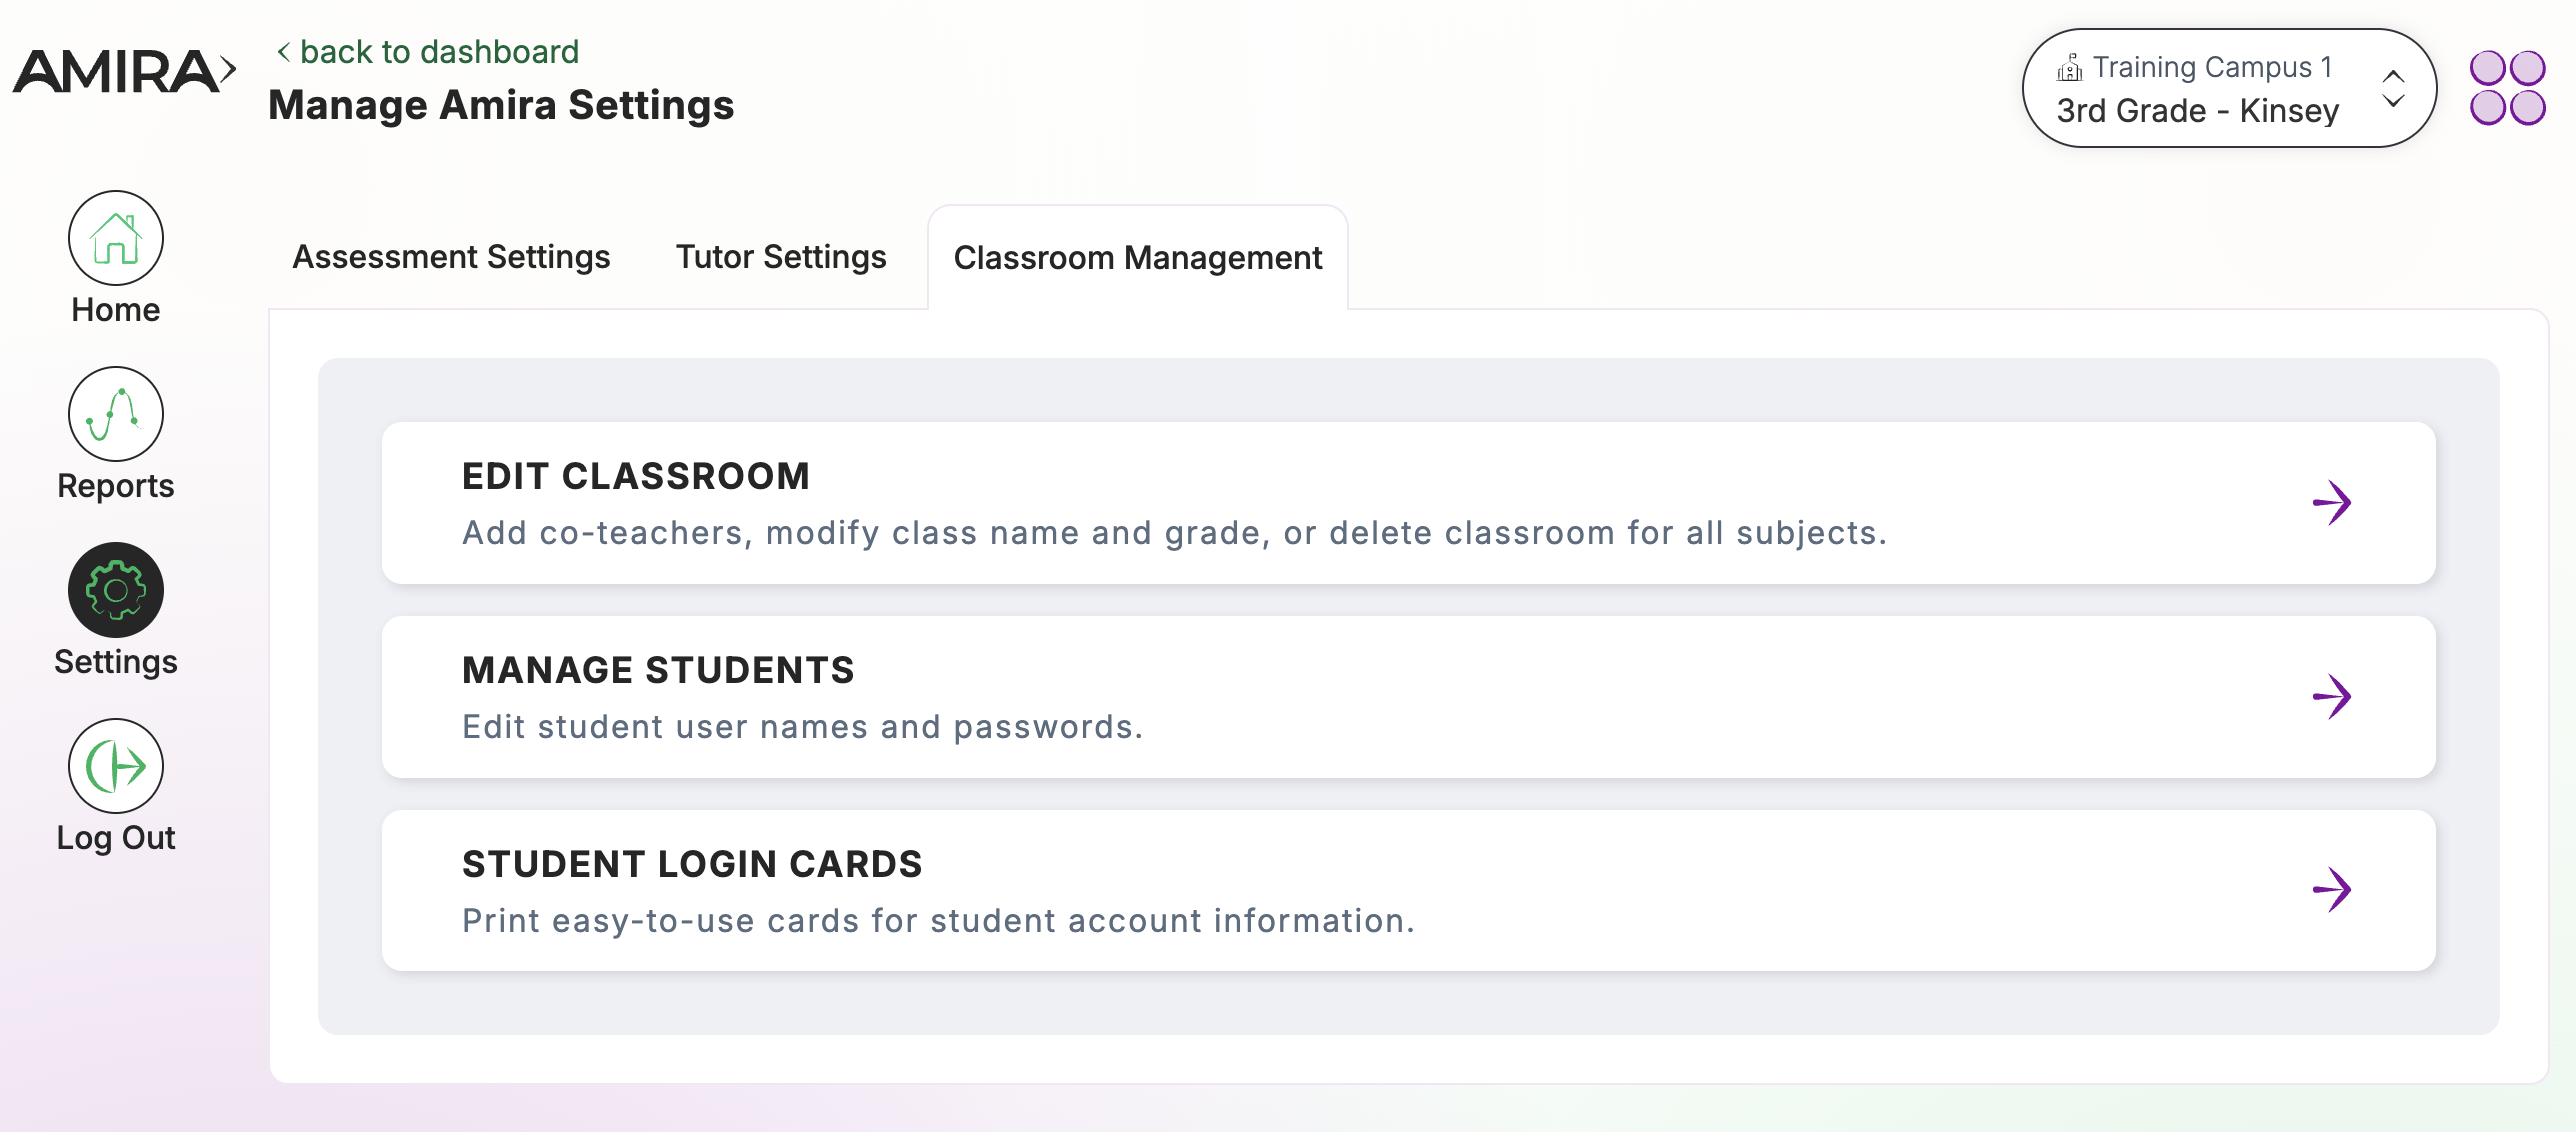
There are three main areas inside this tab: Edit Classroom, Manage Students, and Student Login Cards.
⚠️ If your district rosters via a daily sync with a single sign-on program like Clever or ClassLink, that sync will most likely revert any manual changes you make in Classroom Management. Treat these tools as a stopgap for districts that roster manually, or for quick lookups (like login cards), rather than a permanent fix for synced rosters.
Edit Classroom
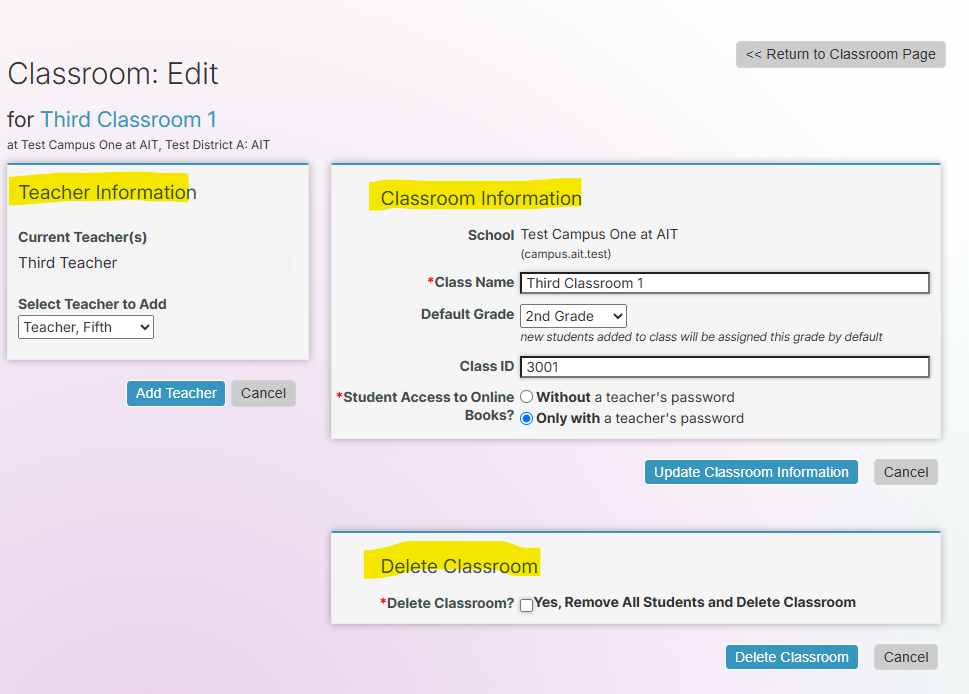
From Classroom Management, click Edit Classroom. This button won't do anything if your administration hasn't granted teachers the authority to create and update classrooms.
- Teacher Information: To add a co-teacher, select them from the dropdown and click Add Teacher. You can only add teachers who your administration has already rostered into the program, you can't add someone from outside the system.
- Classroom Information: Edit your Class Name and Class ID by typing directly, and adjust the Default Grade using the dropdown. Click Update Classroom Information when done. (Ignore the Student Access to Online Books? toggle, it's a legacy feature being phased out.)
- Delete Classroom: Check the box and click Delete Classroom. Use this only to remove an accidental duplicate classroom. At the end of the school year, don't use this to "clean up", wait for your administration to run an End of Year Archive instead, to avoid losing important data.
Manage Students
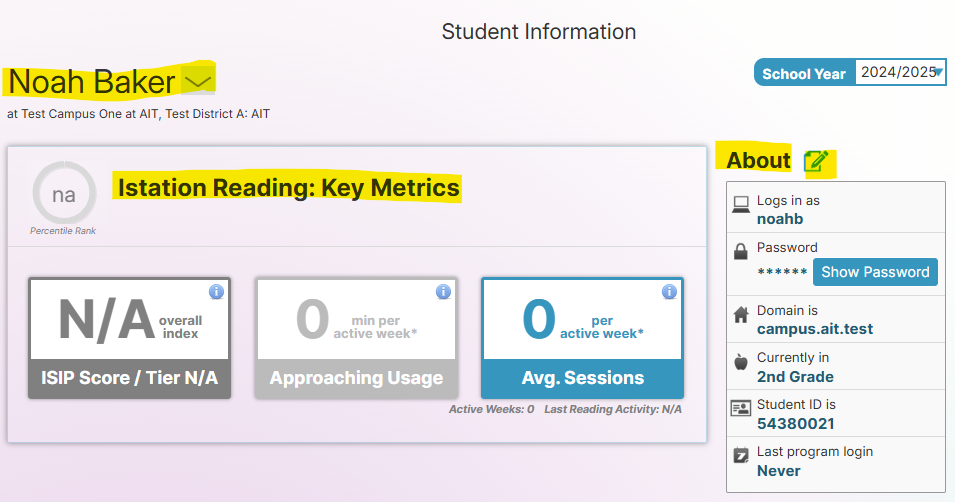
From Classroom Management, click Manage Students.
- Student Name: You'll land on the Student Information page for the first student on your class list. Click the arrow next to their name to switch to a different student.
- About: At-a-glance view of the student's username, password (click Show Password to reveal it), domain, grade level, student ID, and last login date/time.
- Edit Student (paper-and-pencil icon): Click the icon to edit the student's fields via keyboard entry or dropdowns, then click Update Profile. Ignore Other Customizations, it's a legacy Istation feature from before the merger with Amira Learning. As with Edit Classroom, changes here may be reverted by a nightly Clever/ClassLink sync if your district uses one.
Student Login Cards
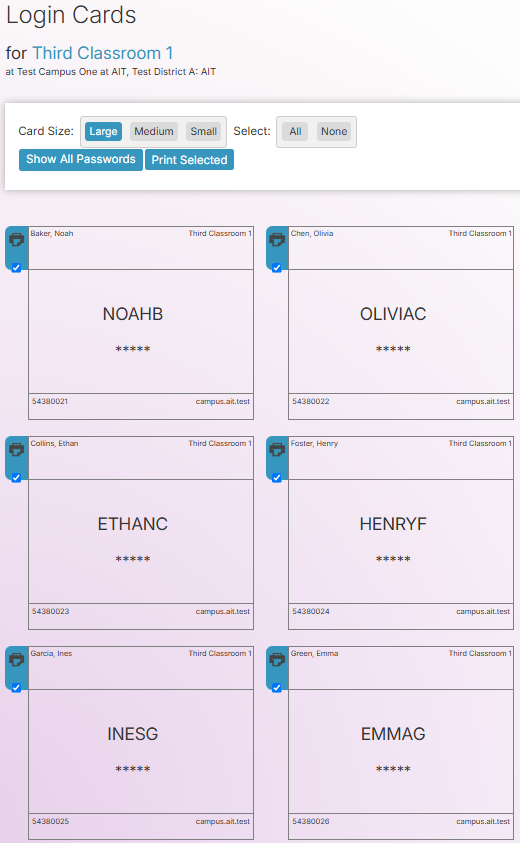
From Classroom Management, click Student Login Cards to print login cards for students who log in manually at home.app.amiralearning.com (for example, to use at home).
- Select the Card Size.
- Click Show All Passwords.
- Select All to print a full class set, or select None and click the printer icon next to each student who needs an individual card.
- Click Print Selected.
Best practice: If a student forgets their password or can't log in, Classroom Management → Manage Students is usually the fastest place to check their username/password before escalating to a support ticket, just remember any fix may not "stick" if your roster syncs nightly with an SSO provider.
Note: If your district permissions don't grant teachers the ability to edit classrooms or students, some of the buttons described above (Edit Classroom, Update Classroom Information, Update Profile) will be visible but inactive. Contact your school or district administrator to request the change instead.