Amira needs microphone access to work properly. Most students just need to click "Allow" when their browser prompts for permission, but if Amira still can't detect a microphone afterward, a quick check of your system's audio settings usually solves it.
Note: Amira is not recommended for use with the Mozilla Firefox web browser or with the Amazon Fire Tablet.
STEP 1: Allow Microphone Access in Your Browser
The first time a student launches Amira, the browser will prompt for microphone permission. This only needs to happen once per device.
CHROME
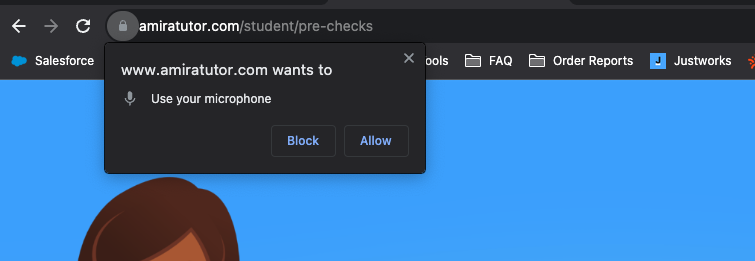
When Amira launches, a permission prompt appears in the top-left corner of the browser window. Click Allow.
SAFARI
A permission prompt appears at the top of the browser window the first time Amira is used. Click Allow.
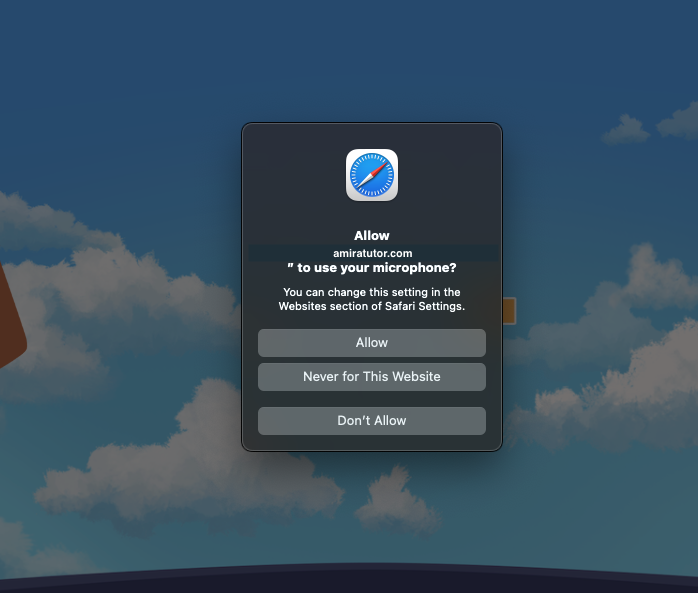
If you don't see a prompt, or get a microphone alert mid-session:
- Click the small red microphone icon in the address bar.
- In the pop-up, select Always allow on amiratutor.com.
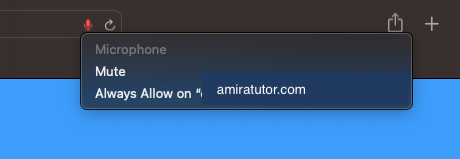
If no microphone appears in the list, you may need to adjust your system's audio settings, see the section below.
EDGE
When Amira launches, a permission prompt appears in the top-left corner of the browser window. Click Allow.
STEP 2: Troubleshooting System Audio Settings
If the browser has permission but Amira still can't detect a microphone, check your device's system settings.
CHROMEBOOK
| 1. Click the system tray in the lower-right corner to open settings. | 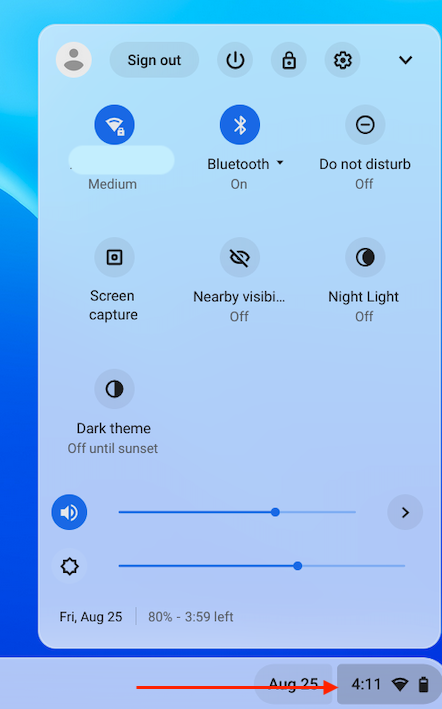 |
| 2. Click the > arrow next to the microphone icon to open audio settings. | 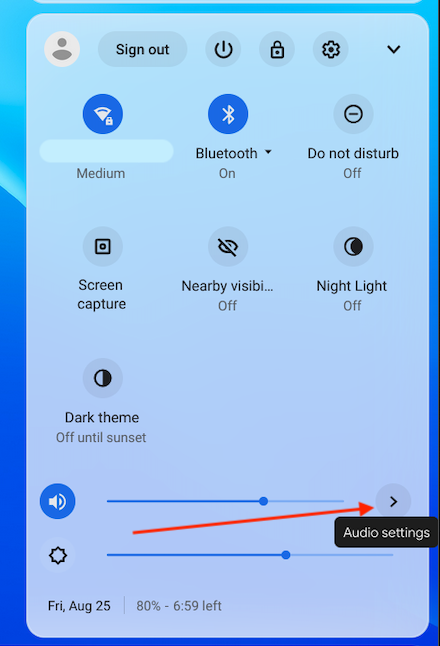 |
| 3. Click the audio settings gear icon. | 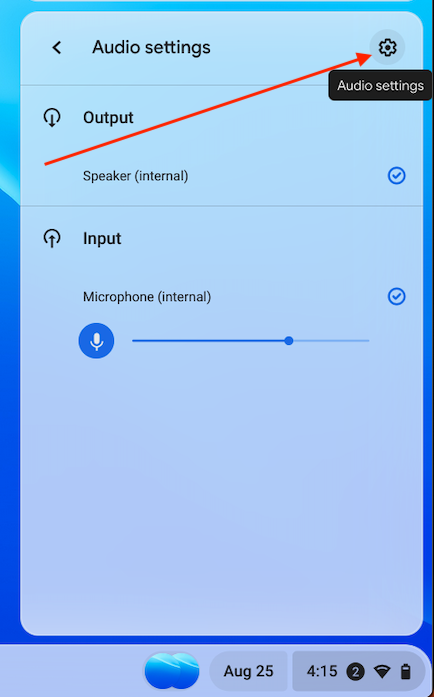 |
| 4. Under Input, select the microphone you’d like to use. You can select Microphone (internal) to use the device microphone or select a headset that is plugged into the device. | 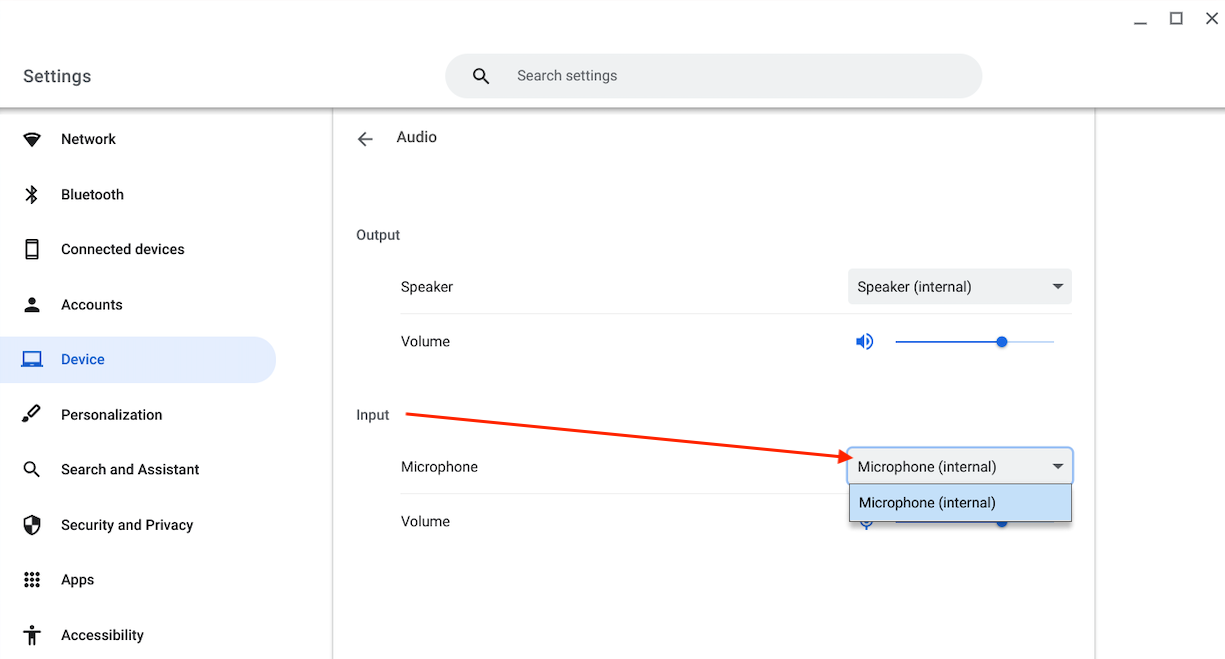 |
| 5. Verify that the microphone volume slider is turned up (we recommend about 50%) | 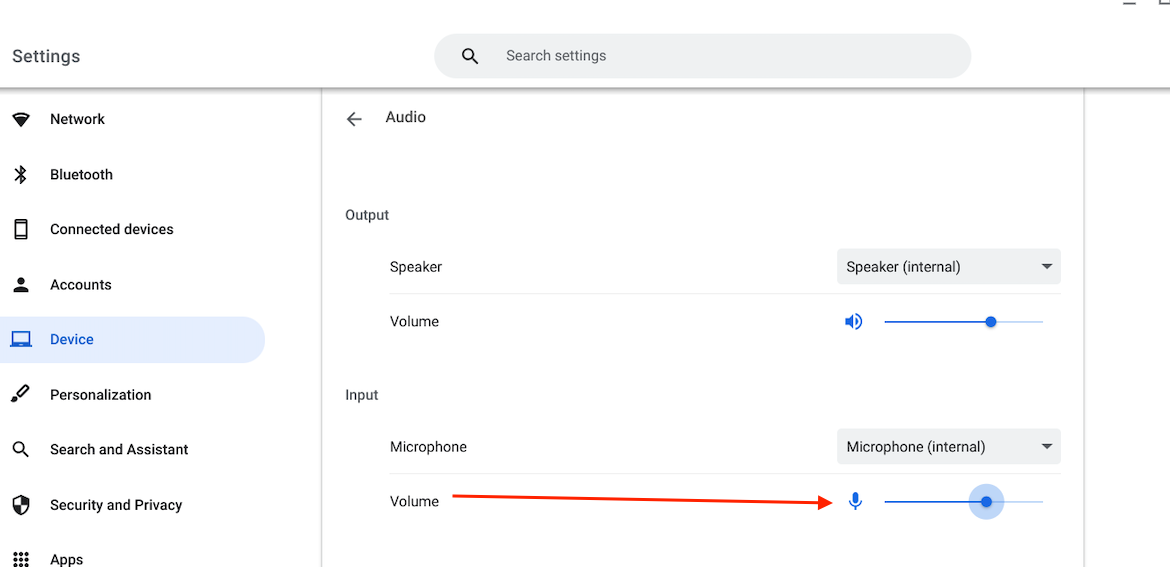 |
WINDOWS
Set the default microphone:
| 1. Right-click the volume icon in the taskbar, then click the > arrow next to the speaker icon. | 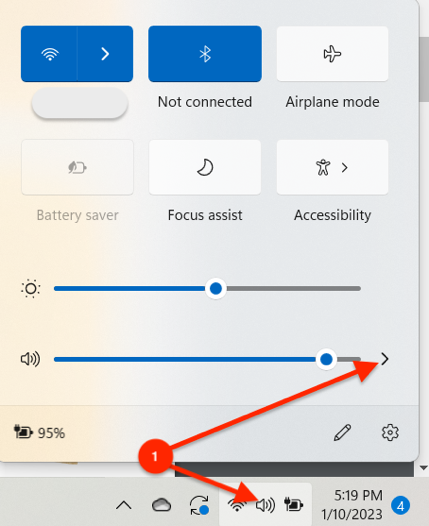 |
| 2. Click More volume settings. | 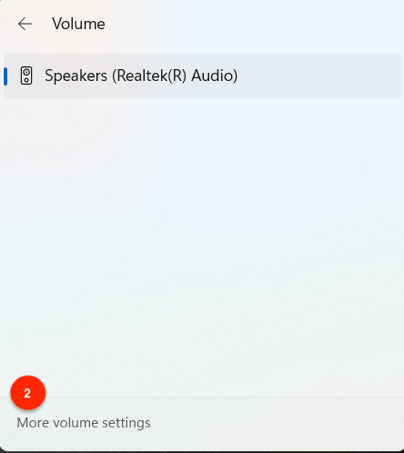 |
| 3. Under System > Sound, choose the microphone you want to use. | |
| 4. Adjust the volume using the slider under Input. | 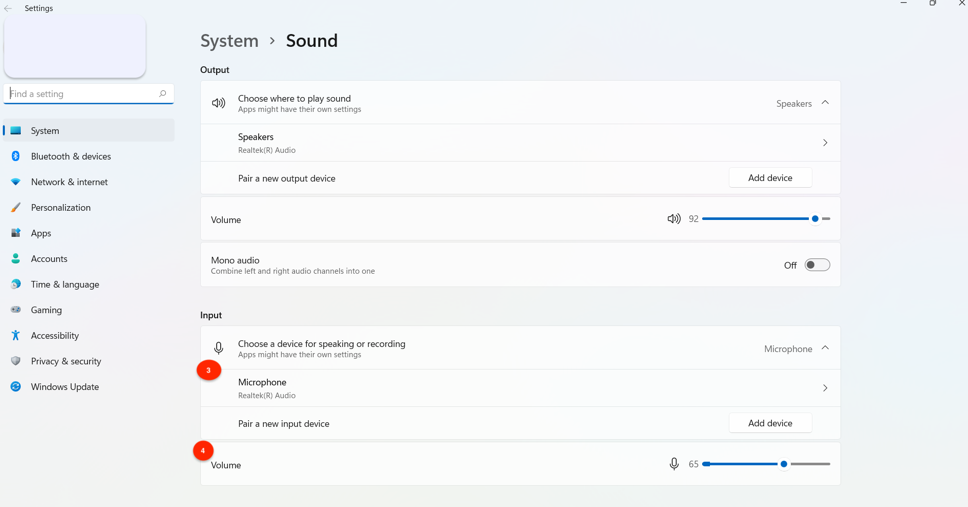 |
Confirm Chrome has microphone access:
- Go to Start > Settings > Privacy > Microphone. Under "Allow access to the microphone on this device," select Change and turn microphone access on.
- Under Allow apps to access your microphone, make sure this is turned On.
- Under Choose which Microsoft apps can access your microphone, turn on access for Chrome.
MAC
| 1. Click the Apple icon in the upper-left corner. | 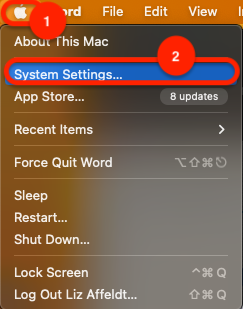 |
| 2. Select System Settings. | |
| 2. Click the Sound option. | 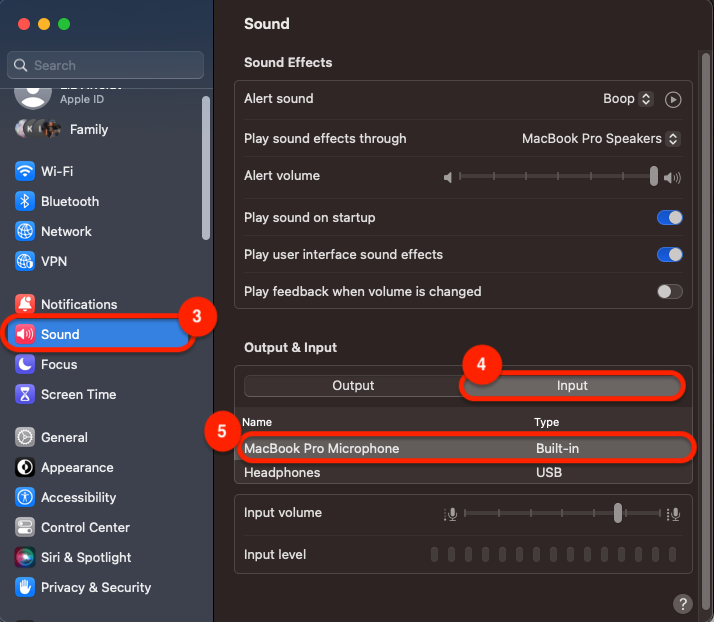 |
| 3. In the Input tab, select your microphone. | |
| 4. Adjust the volume to at least 50%. |
IPAD
- Open the Settings app.
- Select Safari from the left-hand menu.
- Tap Clear History and Website Data > Clear.
- Scroll to Settings for Websites and tap Microphone.
- Choose Ask to be prompted each time, or Allow to grant access automatically on every visit.
STEP 3: Resetting Microphone Permissions in Chrome
If the microphone is enabled and you've clicked Allow, but Amira still isn't working, try resetting Chrome's site-level permissions.
Method 1, Reset from the address bar:
- Launch Amira.
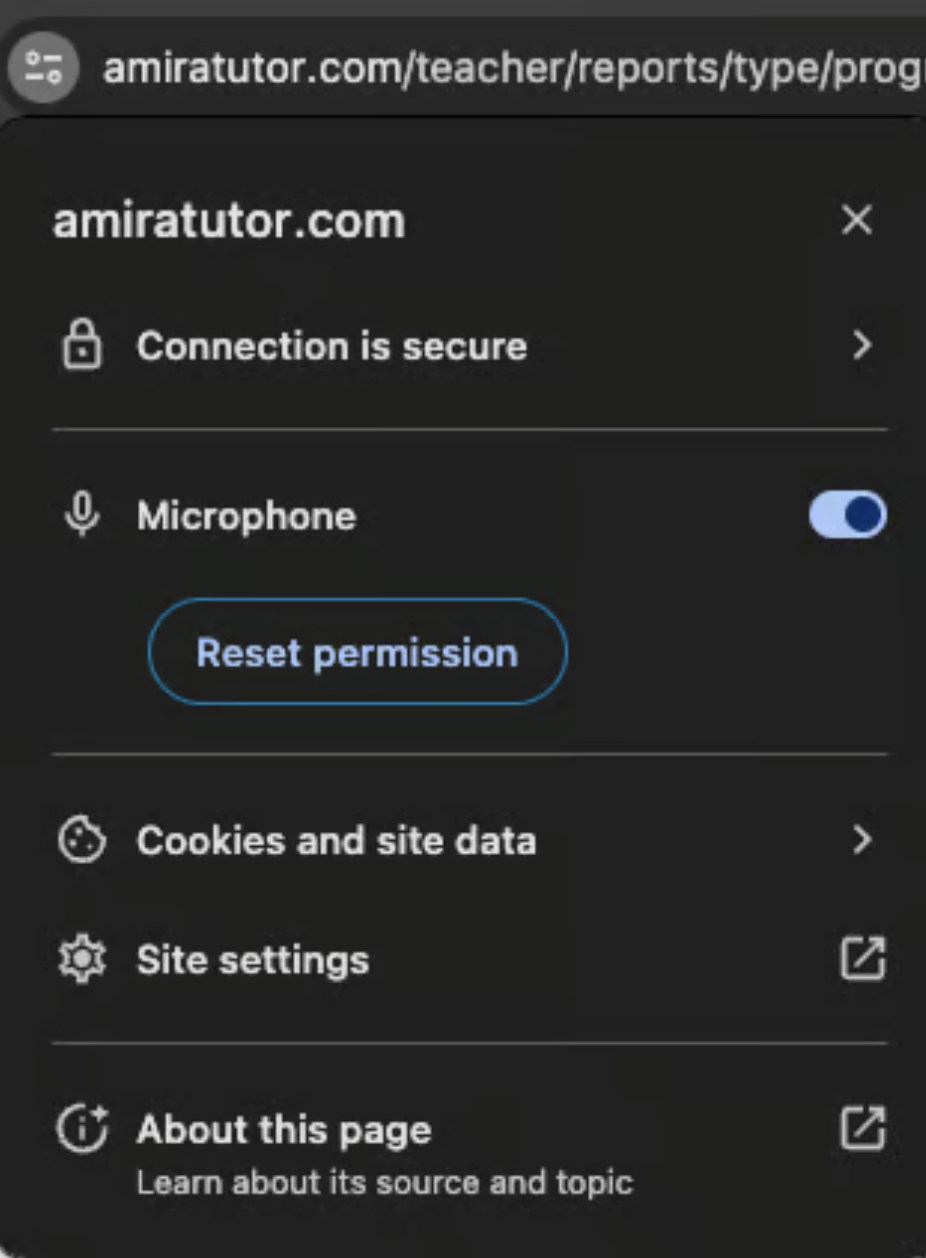
- Click the icon just left of the web address (looks like a slider).
- Find Microphone in the list and click Reset permission.
- Close the tab, then relaunch Amira. You'll be prompted to click Allow again.
Method 2, Reset from Chrome settings:
- Open Chrome and go to the three dots in the top-right corner.
- Select Settings > Privacy and Security > Site Settings > Microphone.
- Find amiratutor.com and click the trash can icon to remove its permissions.
- Relaunch Chrome and Amira.