This guide walks a district administrator through Amira Learning's 1File CSV import, which adds your campuses, teachers, students, and classrooms from a single template file. Each step below corresponds to what you'll see on screen.
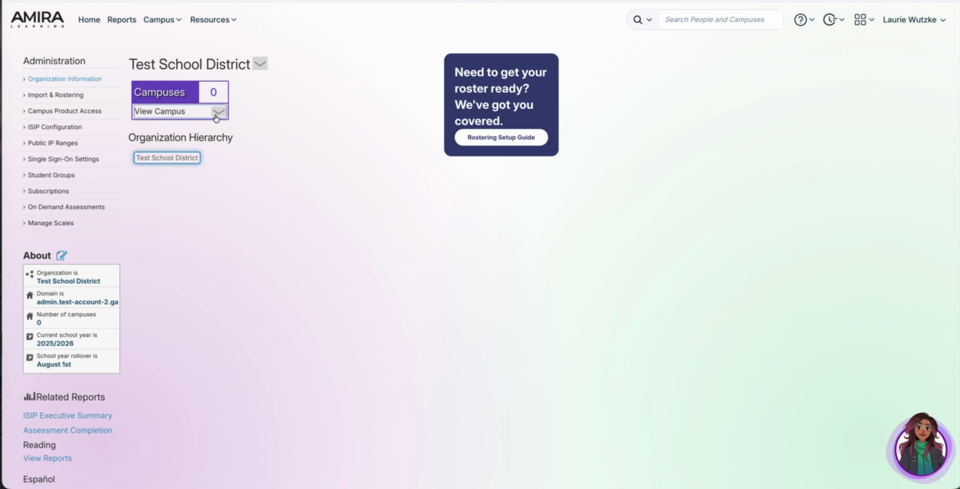
Step 1, Review your district landing page
When you log in as a district administrator, you land on the Organization Information page. If this is your first time rostering with Amira, the campus count shows 0 and no campuses are listed yet, you'll add them through the 1File import. The Rostering Setup Guide link (top right) opens the Help Center if you'd like reference material first.
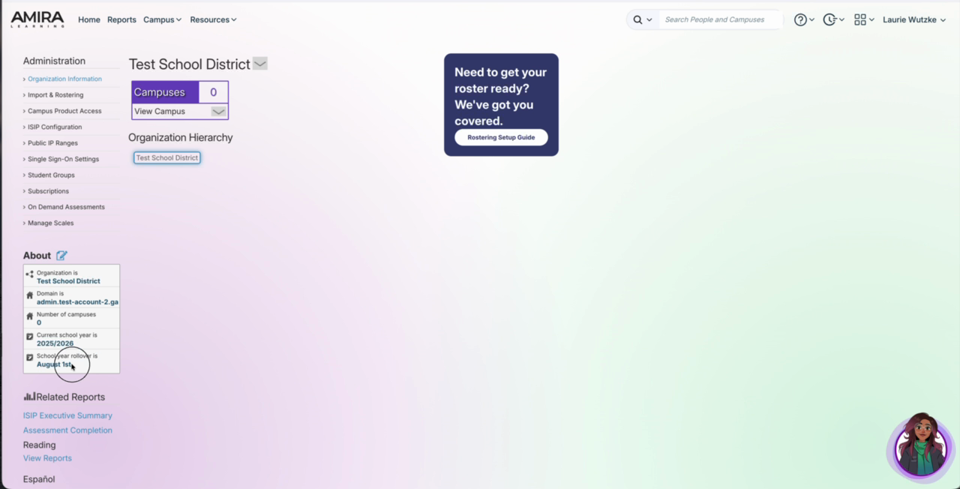
Step 2, Confirm your school year rollover date
In the About panel at the lower left of the Organization Information page, check the school year rollover date. This should be the first day of your school year; the default is August 1. If you need to change it, work with your support specialist to update it before your school year starts. Please reach out to support@amiralearning.com for assistance.
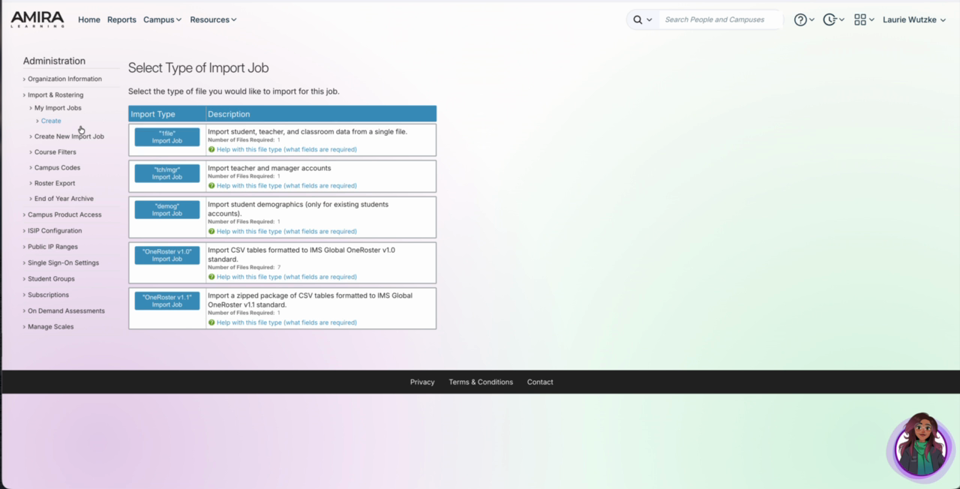
Step 3, Start a new 1File import job
Open Import & Rostering in the left menu and choose Create New Import Job. On the Select Type of Import Job screen, select the 1File import, it brings in student, teacher, and classroom data from a single file.
Step 4, Set your import options and download the template
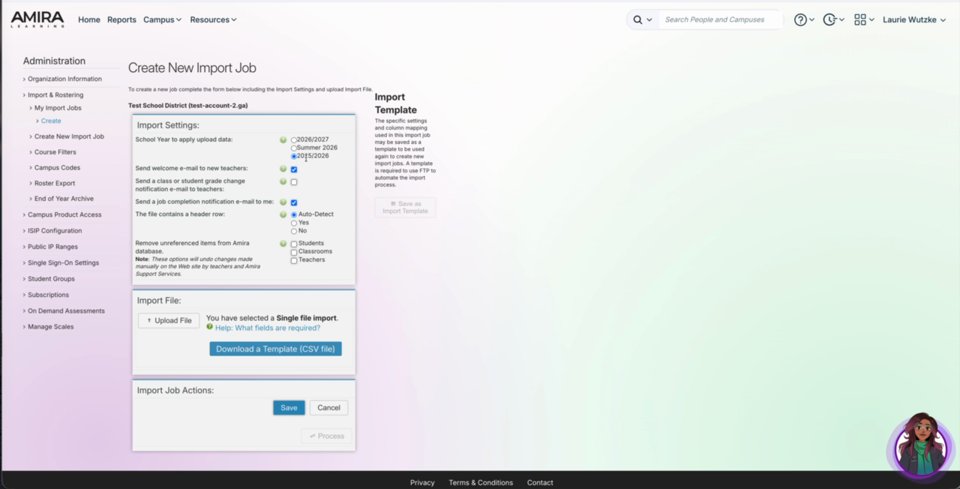
On the Create New Import Job page, review the import settings. Most can stay at their defaults:
- School year to apply the data, defaults to the current school year.
- Send welcome email to new teachers, emails new teachers their login credentials and a prompt to reset their password.
- Send job-completion email to me, keep this checked to be emailed when the import finishes; uncheck it to skip the email.
- The file contains a header row, leave on Auto-Detect when using Amira's template. Choose No only if you're using your own template, which then requires manual field mapping.
- Remove unreferenced items from Amira, optional. Used later in the year, it removes students, classrooms, or teachers that are not present in your new file.
Click Download a Template (CSV file) to get Amira's 1File template, fill it out, then use Upload File to upload your completed file.
Tip: Amira recommends using the provided template. It's auto-detected on the next screen, so no manual field mapping is needed.
Step 5, Review the column mapping
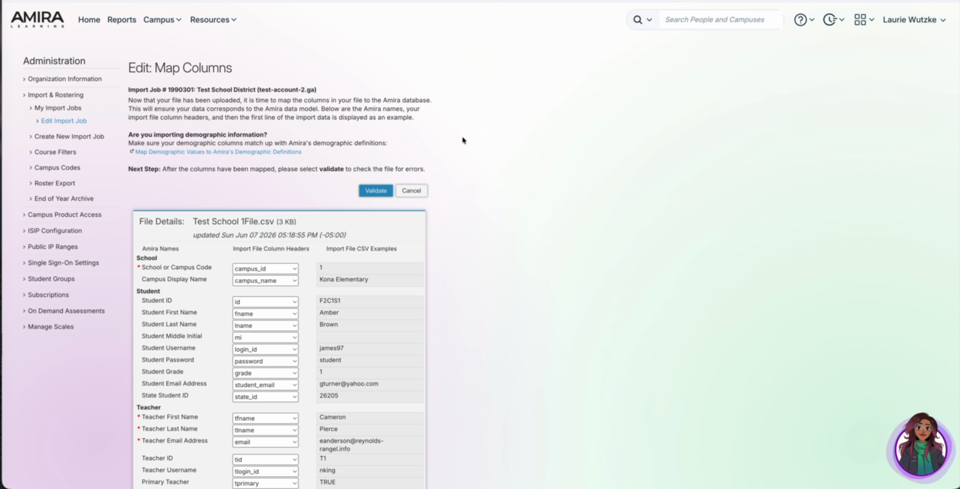
After uploading, you're taken to the Map Columns validation screen. When you use Amira's template, every column is auto-detected and mapped to the correct Amira field. The 1File template includes:
- School, school/campus code (required) and campus display name.
- Student, ID, first and last name, middle initial, username, password, grade, email, and state ID.
- Teacher, first and last name, email, teacher ID, username, and Primary Teacher. Set Primary Teacher to TRUE for the teacher who should be listed as primary; you can add multiple teachers to the same class.
- Classroom, classroom ID, period, and class name. When adding multiple teachers to one class, use a classroom ID and class name so duplicate classes aren't created.
- Student demographics (optional), gender, race, special education, instructional type, and more.
Step 6, Validate the file
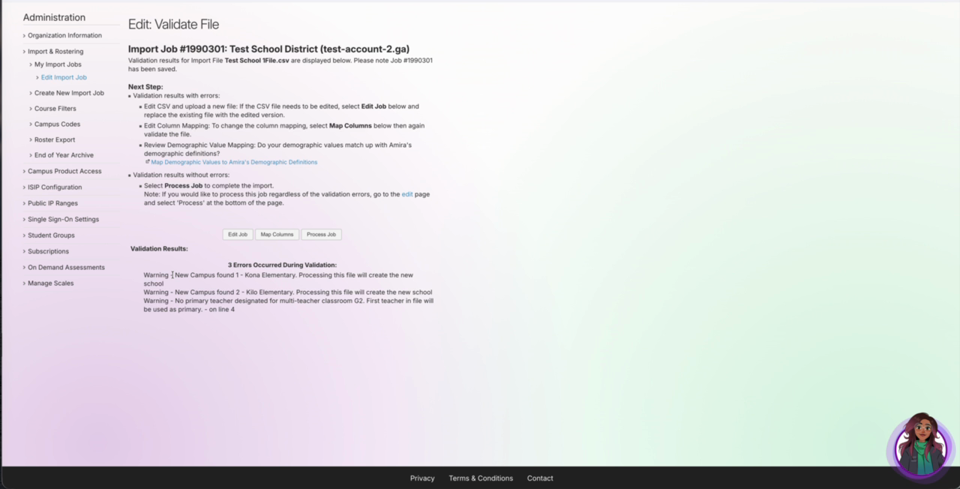
When the columns look correct, click Validate. Amira checks the file and displays any results. Warnings don't always require action. For example, “New campus found” is expected when you're adding new campuses, and “No primary teacher designated for this multi-teacher classroom” means the first teacher listed will be used as the primary. Review the messages and fix anything flagged as an actual error before continuing.
Step 7, Process the job
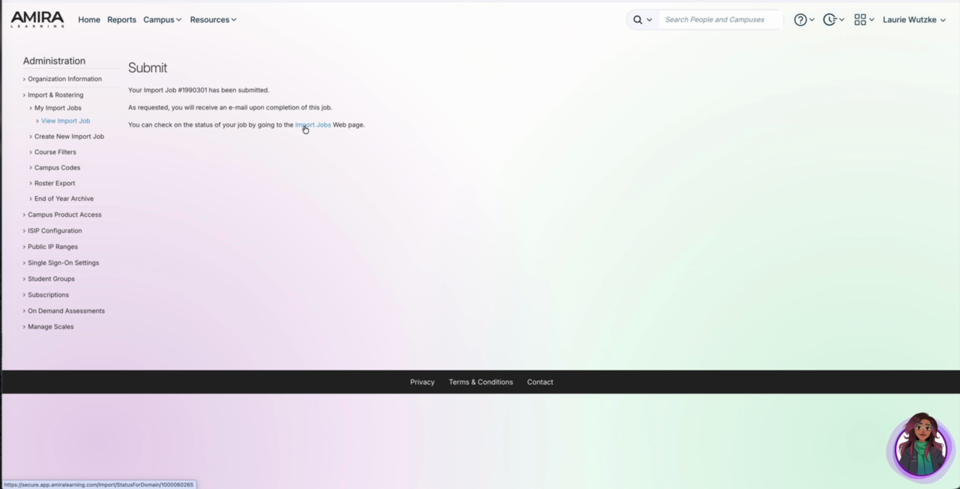
If the validation results are acceptable, click Process Job to run the import. You'll see a confirmation that the job has been submitted, and, if you left the notification checked, you'll receive an email when it completes.
Step 8, Check the job status
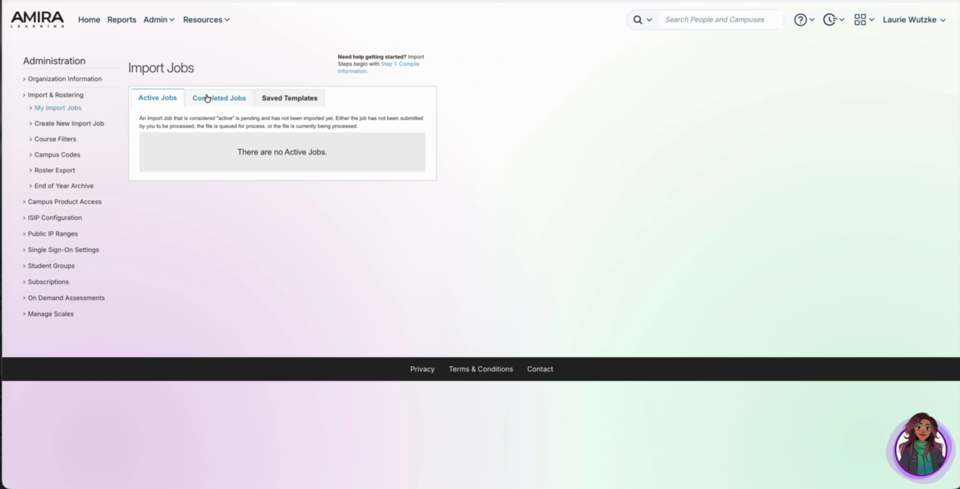
Open Import & Rostering > Import Jobs to view Active Jobs, Completed Jobs, and Saved Templates. When your job appears under Completed, your users have been created.
Step 9, Confirm your rostered data
Return to Organization Information. Your new campuses now appear and the campus count updates, in this example, two campuses: Kilo Elementary and Kona Elementary.
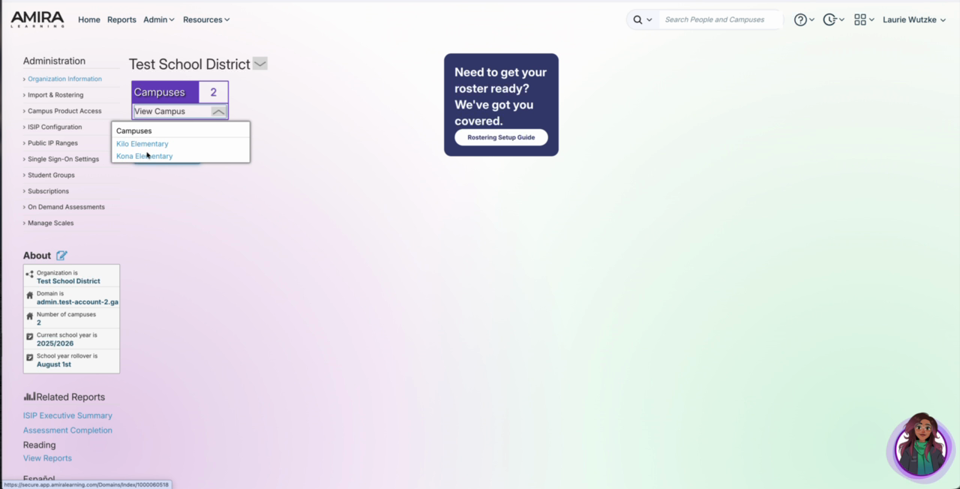
Select a campus to confirm the import. You'll see students by grade, teacher information, and classrooms, along with the student details:
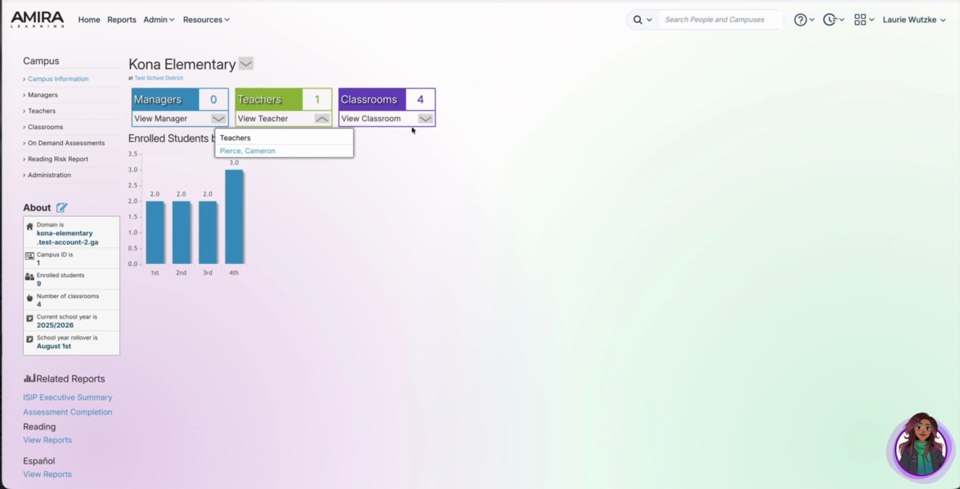
That completes the 1File setup. If you have additional questions, please email support@amiralearning.com.