While it is recommended that student data be added by the school or district through an import process by a manager, students can also be added manually to classrooms using this guide.
All student data is associated with the student’s ID number. This allows students to be placed in more than one classroom for multiple teachers to review data, for students to easily transfer between campuses, or for students to be removed and later re-added without any data being lost. Students who are added to another school in the district will automatically be removed from the original school. To help preserve historical data about classrooms and schools, student accounts should NOT be removed at the end of the school year.
Walkthrough: How To Add and Remove Students Manually as a Teacher
How to Add and Remove Students Manually as an Admin:
Step 1: Log in to secure.app.amiralearning.com and select Amira Reading.
Step 2: From your Home page, select Roster Management.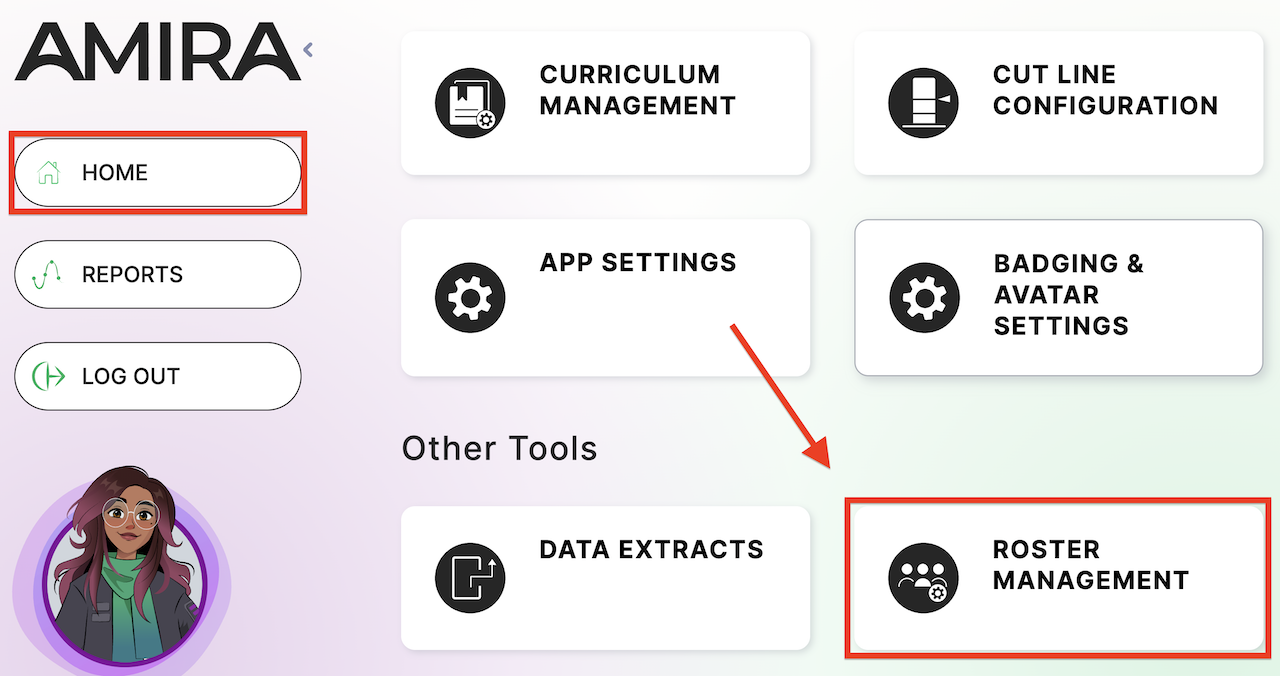
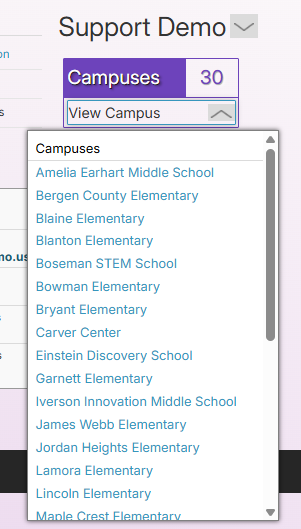
Step 3a (District Admin): Select Organization Information from the left-side menu, select which campus the student will be rostered at from the Campuses drop-down menu, and select which classroom the student will be rostered in from the Classrooms drop-down menu.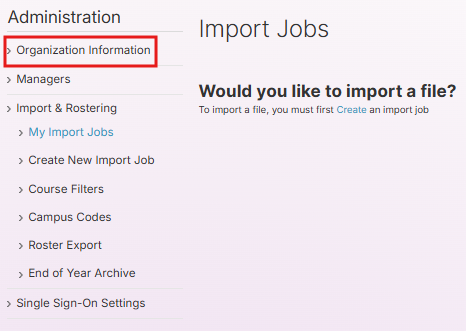
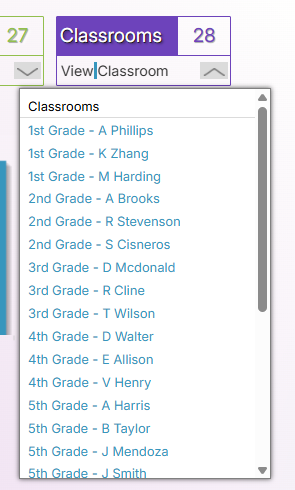
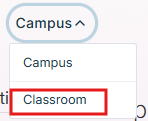
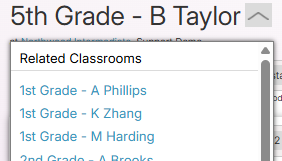
Step 3b (Campus Admin): Expand the Campus drop-down menu in the top left and select Classroom. If needed, change the classroom using the drop-down menu that expands after clicking the current classroom name.
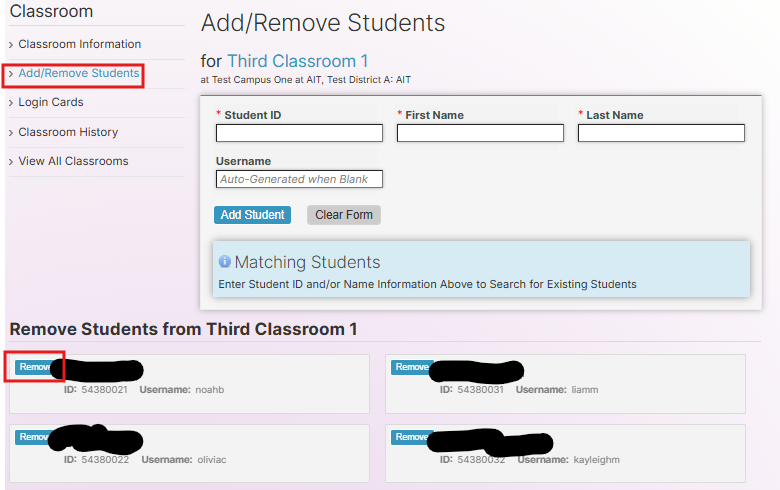
Step 4: In the left menu, select Add/Remove Students.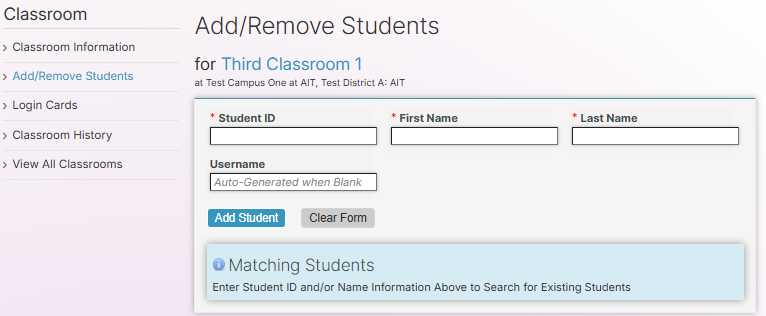
Step 5: Fill in all fields with a red asterisk and adjust the Grade drop-down menu. Fields can be completed manually, or a search can be done based on one field if the student has already been added to Amira Learning anywhere in the district. To search for a student, complete one field, move to the next field, and review the options that appear under Matching Students.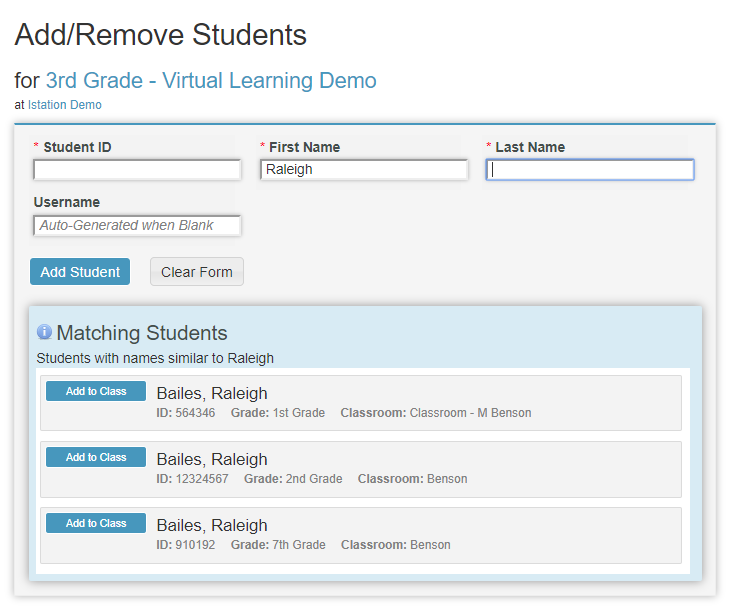
NOTE: While searching, the site may highlight fields in red that are incomplete, but it will display a spinning circle to indicate that it is searching the database for a matching student.Step 6: If the correct student is listed, click Add to Class to add the student to the classroom.
To Remove Students:
Step 6: Scroll down, click Remove in front of the name of the student(s) to be removed, and confirm to remove the student(s).
Lectura/Math
Add Students
Step 1: Log in to secure.app.amiralearning.com and select Lectura & Math.
Step 2: Select the Classroom tab in the top left.The screen will open to the most recently viewed classroom if multiple classrooms can be seen. A different classroom can be selected at the top of the screen by using the drop-down menu where the class title is listed.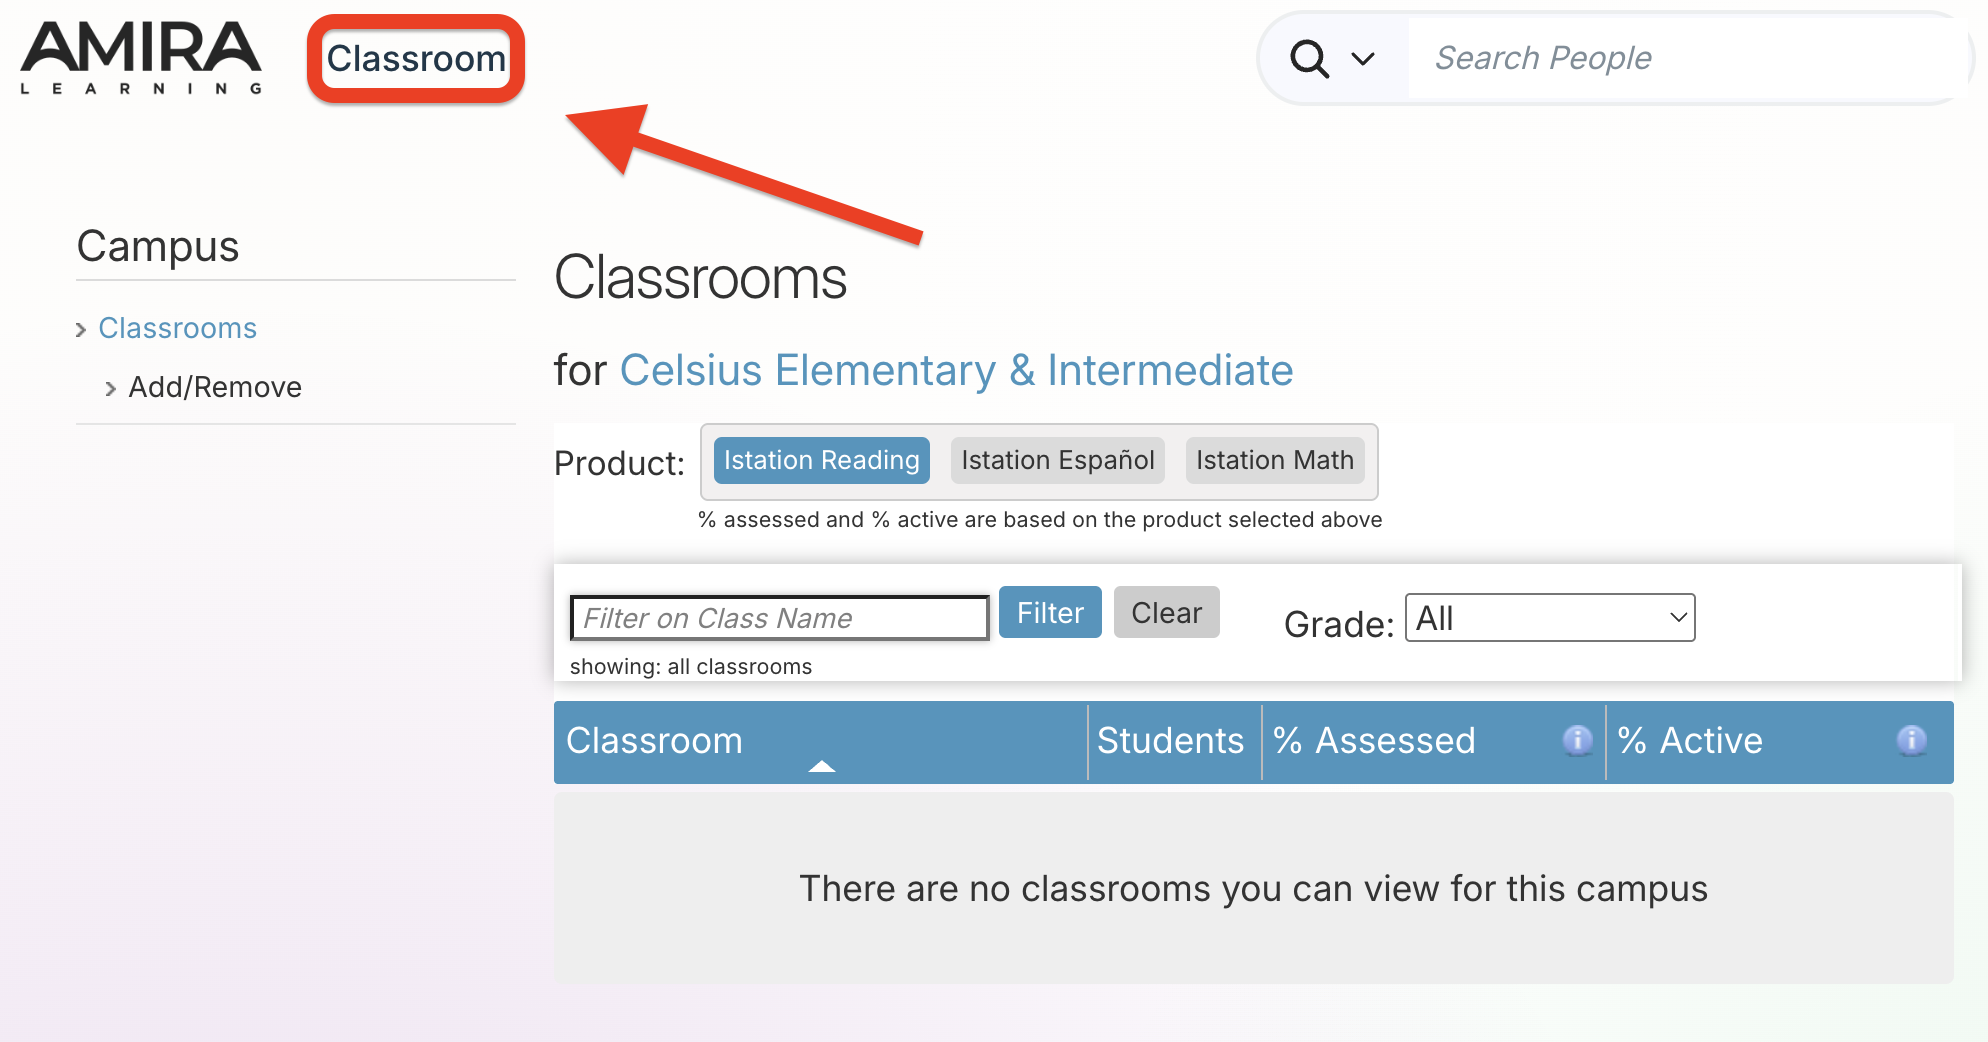
Step 3: In the left menu, select Add/Remove Students.
Step 4: Fill in all fields with a red asterisk and adjust the Grade drop-down menu. Fields can be completed manually, or a search can be done based on one field if the student has already been added to Amira Learning anywhere in the district. To search for a student, complete one field, move to the next field, and review the options that appear under Matching Students.
NOTE: While searching, the site may highlight fields in red that are incomplete, but it will display a spinning circle to indicate that it is searching the database for a matching student.Step 5: If the correct student is listed, click Add to Class to add the student to the classroom.
Remove Students
Step 5: Scroll down, click Remove in front of the name of the student(s) to be removed, and confirm to remove the student(s).
Classroom History
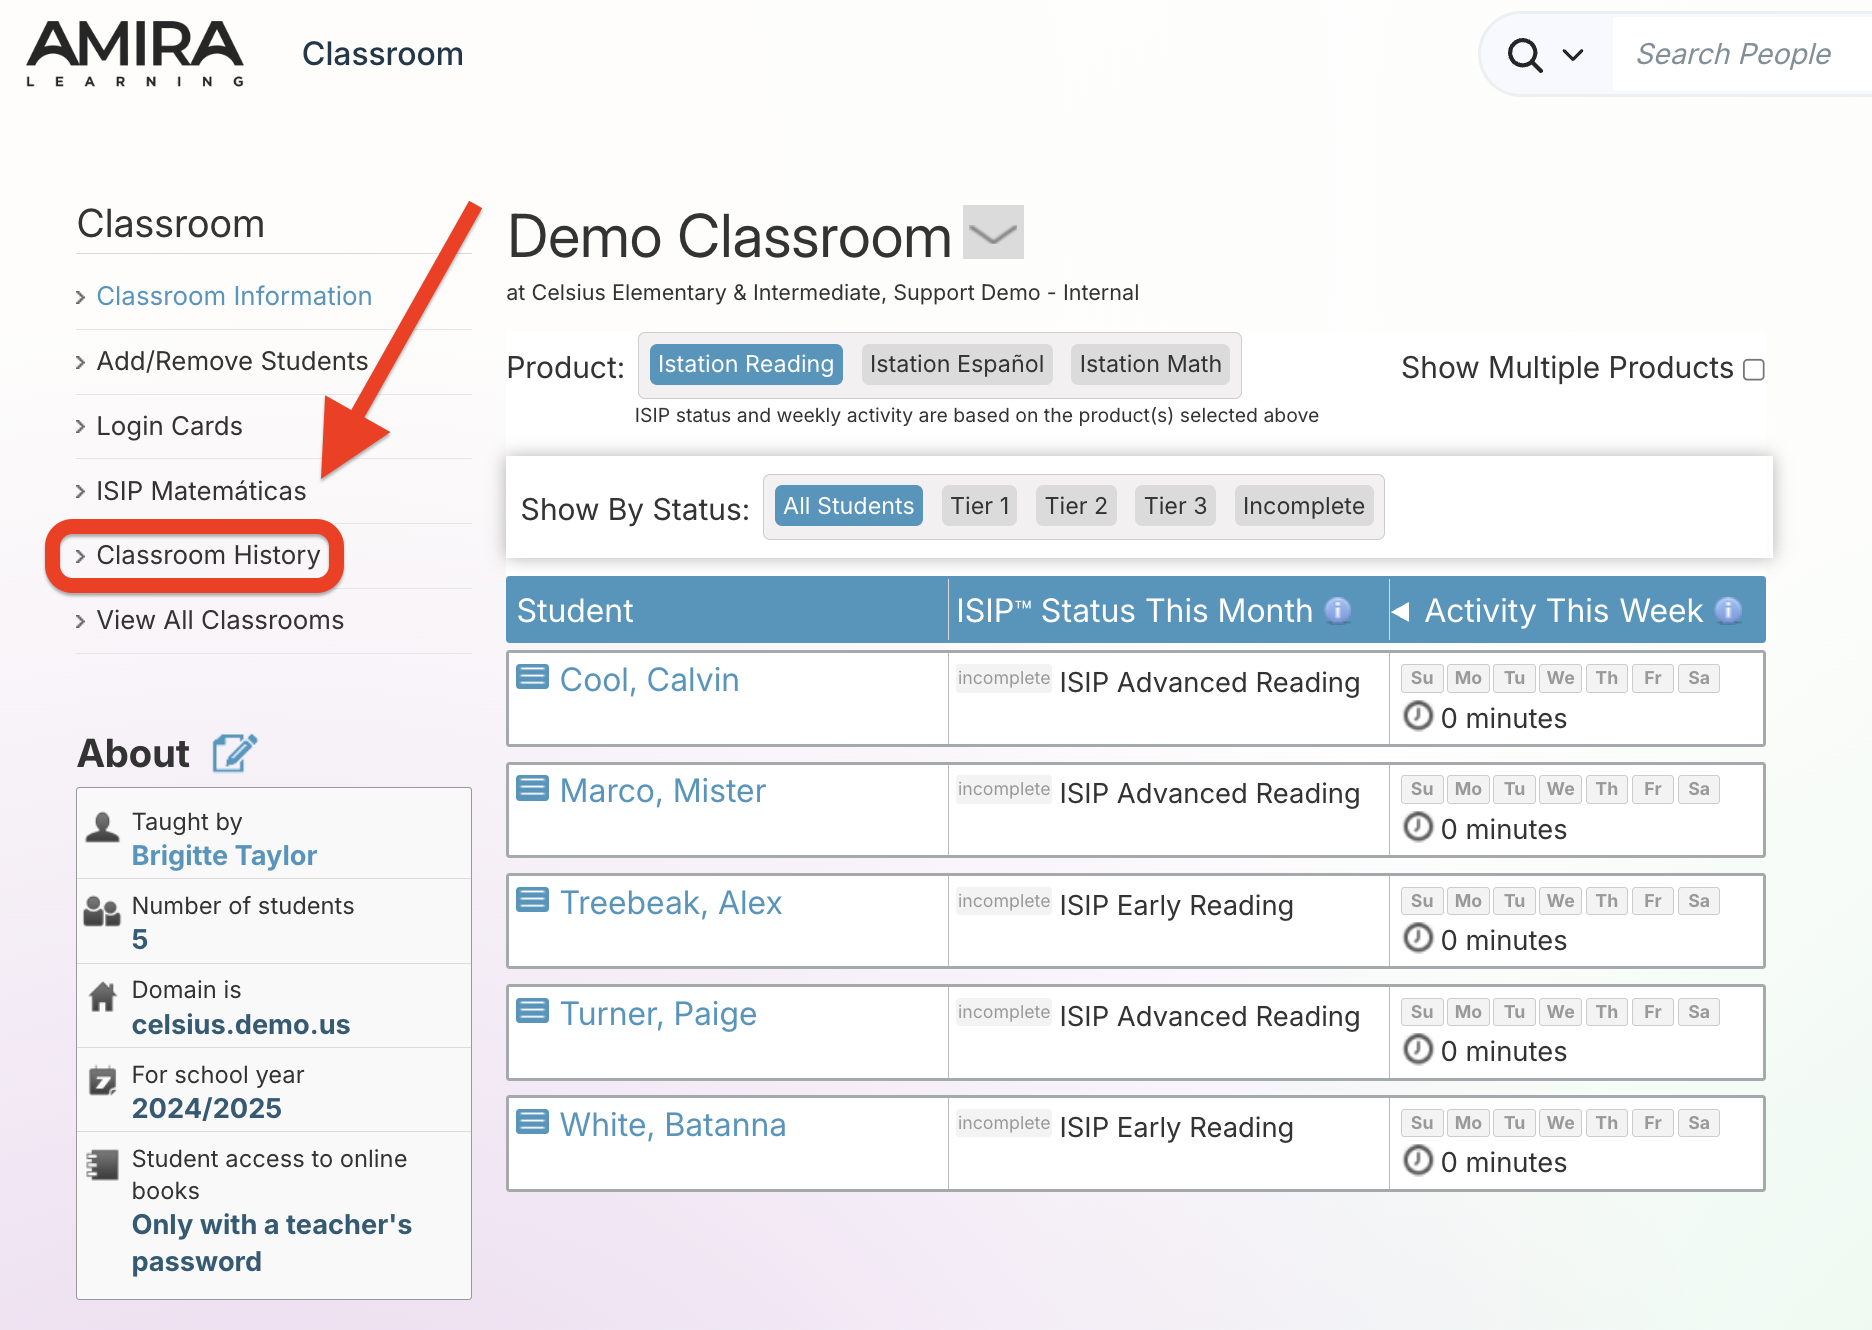
The Classroom History page lists each time a student was added to or removed from a classroom and who made this adjustment.
Step 1: Log in at secure.app.amiralearning.com.
Step 2: Navigate to the desired Classroom Information page.
Note: Your click-path depends on your product starting point and educator role. Amira Reading teachers go to Settings > Classsroom Management > Edit Classroom > Return to Classroom Page. Amira Reading district admins go to Home > Roster Management > Organization Information > Campus > Classroom. Amira Reading campus admins go to Home > Roster Management > Campus tab > Classroom tab. Lectura/Math educators click on the Classroom tab after logging in and selecting Lectura & Math. More detailed screenshots are provided in the Step-by-Step Guides for adding and removing students above.
Step 3: Select Classroom History from the left column.
Common Issues Adding Students
ISSUE: The student ID is already in use by another student in the district.
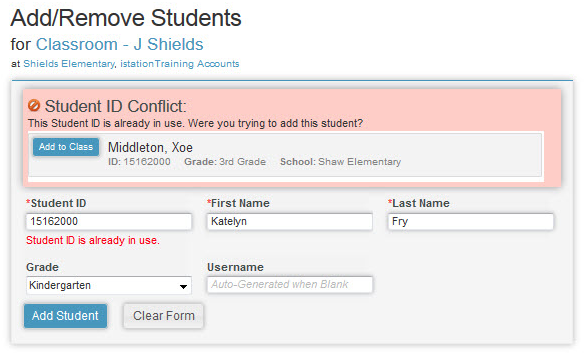
SOLUTION: Verify that the student ID is correct for the student being added. If it is correct, the district may need to be contacted to correct the ID for the other student.
ISSUE: The user name is already in use by another student in the school.
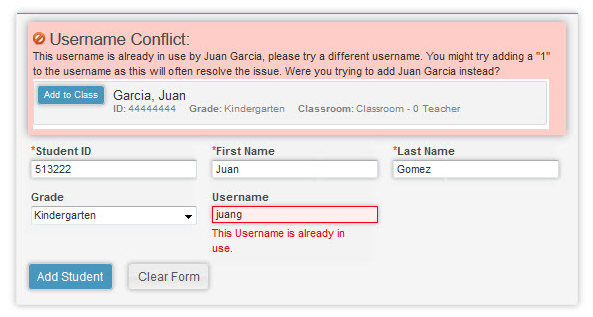
SOLUTION: Follow the district’s convention and preferences for student user names. If using the Amira Learning default (first name followed by the last initial), a number can be added to the end of the user name. Use caution when logging students into the program to ensure that the correct student is using the correct user name.
ISSUE: The student being added is already listed in Amira Learning as a student of a different grade level.
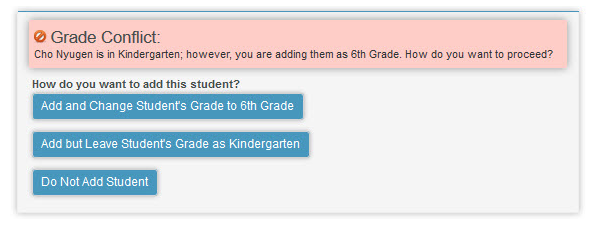
SOLUTION: To ensure accuracy of reporting and the best experience for the student, the student should be listed at the correct district-assigned grade level.