Prerequisites
-
District Administrator access to the Amira Learning Administrator Dashboard
Walkthrough: Campus Product Access Tool
Steps
-
Log in to your Administrator Dashboard.
-
From the home screen, click Roster Management under the Other Tools section.
-
In the left sidebar under Administration, click Campus Product Access.
-
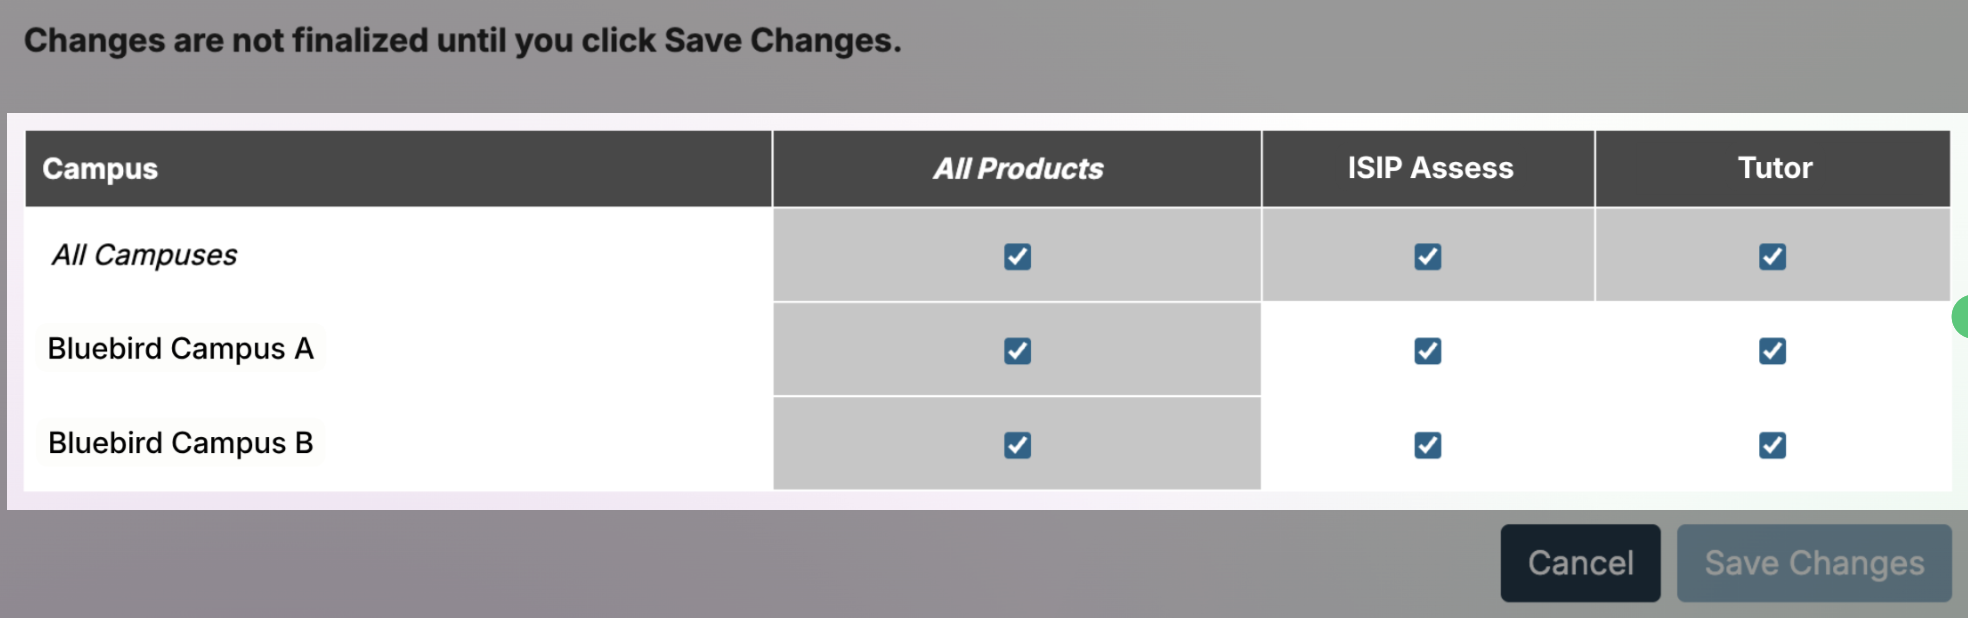
On the Campus Product Access page, use the checkboxes in the table to configure product access for each campus:
-
Each row represents a campus; each column represents an available product (e.g., ISIP Assess, Tutor).
-
Check or uncheck the All Products checkbox in a campus row to enable or disable all products for that campus at once.
-
Use individual product checkboxes to turn access on or off product by product.
-
Use the All Campuses row to enable or disable a single product across every campus simultaneously.
-
-
When finished, click Save Changes.
Note: Changes are not saved until you click Save Changes. Clicking Cancel will discard any unsaved selections.
Checkbox Behavior Reference
|
Checkbox Location |
What It Controls |
|---|---|
|
All Products, in a specific campus row |
Enables or disables all products for that one campus |
|
Individual product, in a specific campus row |
Enables or disables that single product for that one campus |
|
All Campuses row, in a product column |
Enables or disables that product across all campuses |
|
All Campuses / All Products checkbox |
Enables or disables all products at all campuses at once |