Most audio issues on student devices come down to three things: the microphone is muted or its volume is too low, the browser doesn't have permission to use it, or the wrong microphone is selected. On Chromebook, these are checked and adjusted directly in Chrome and Chrome OS settings. On iPad, iOS manages microphone input automatically, so checks focus on the Ring/Silent switch, Safari's permission settings, and which microphone is currently connected.
CHROMEBOOK, Google Chrome
Check your device or headset is not muted and adjust audio input level
- Click the clock/system tray in the bottom-right corner of the screen.
- Click the Settings (gear) icon.
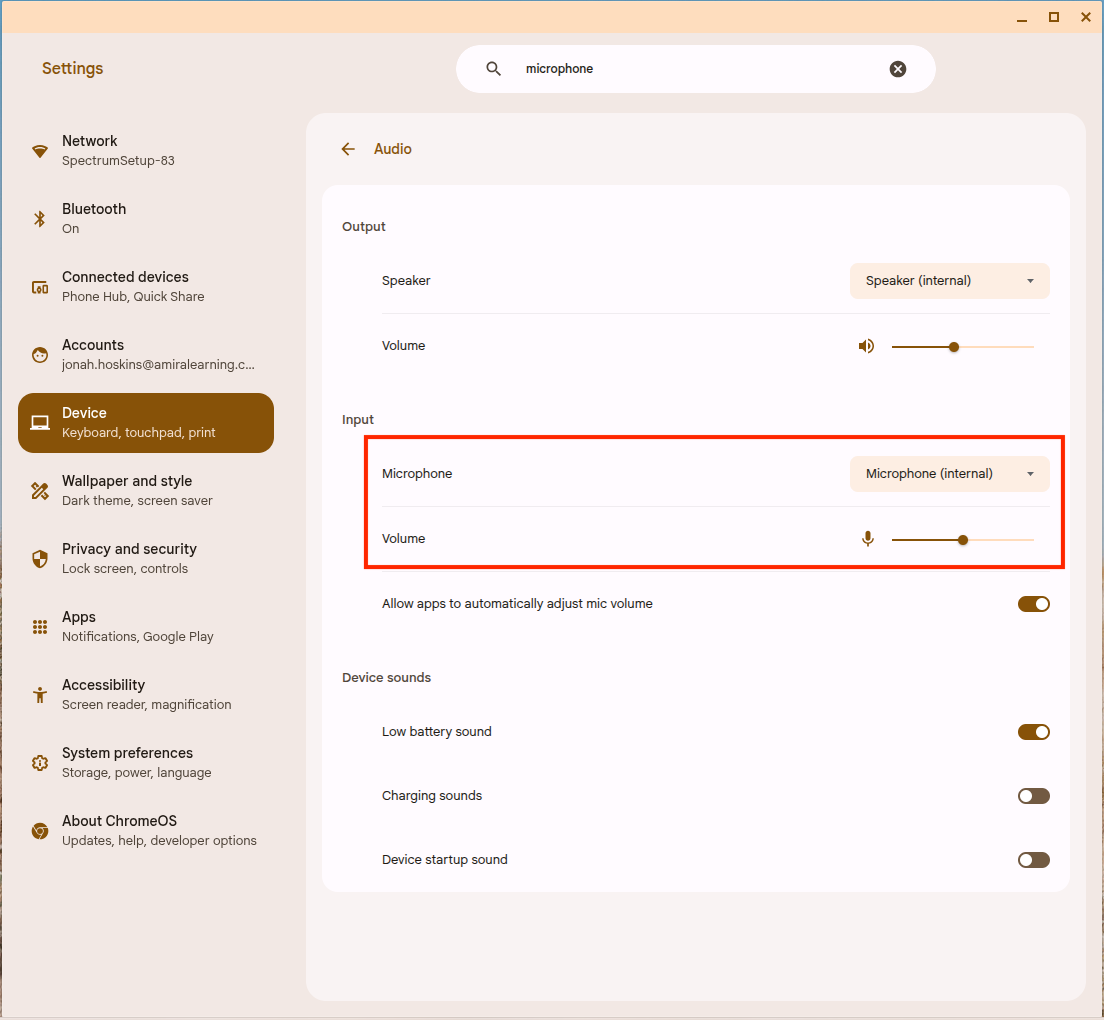
- In the Settings search bar, type Microphone.
- Under Input, confirm the correct microphone is enabled (internal or usb/headset).
- Drag the input volume slider to 50%. The mute icon (microphone with a line through it) should not be active.
- If using a wired headset, check whether it has a small mute button on the cable itself (usually a button or switch located partway along the cord). If so, make sure it hasn't been accidentally pressed, when active, this will silence the microphone even if everything else is set up correctly.
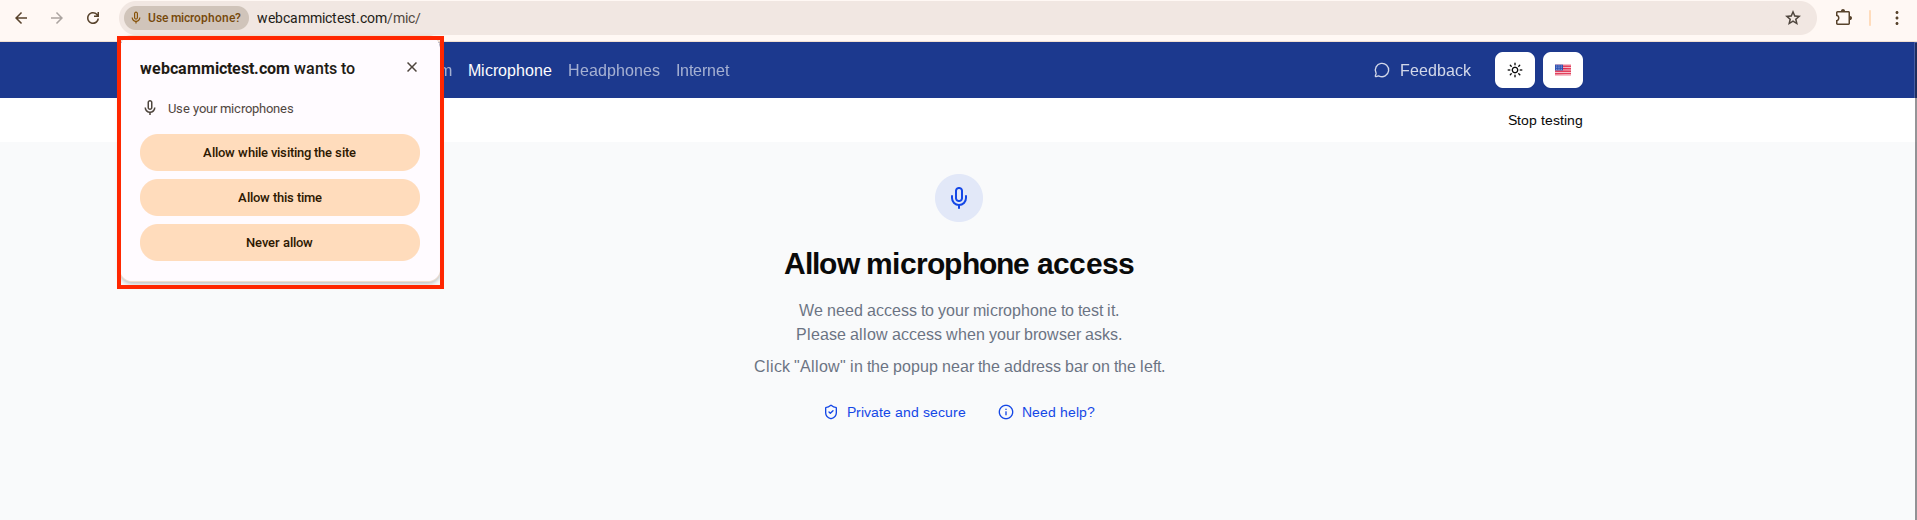
Confirm the microphone is enabled for Chrome
- Open Chrome and navigate to the site being used.
- Click the lock icon in the address bar.
- Select Allow while visiting this site
- Refresh the page for the change to take effect.
Switch to the device's internal microphone
- Unplug your headset
- Click the clock/system tray in the bottom-right corner.
- Click the Settings (gear) icon.
- Search for Microphone in the settings search bar.
- Under Input, click the microphone dropdown.
- Select Internal Microphone from the list.
- Return to your browser tab and refresh the page so the change takes effect.
IPAD, Safari
Check your device or headset is not muted and adjust audio input level
iPads do not have a manual microphone input volume adjuster, input sensitivity is managed automatically by iOS. Instead, check the following:
- Ensure the device is not on silent mode: check that the Ring/Silent switch on the side of the iPad is not switched to silent (showing orange means silent is on).
- If using a wired headset, check whether it has a small mute button on the cable itself (usually a button or switch located partway along the cord). If so, make sure it hasn't been accidentally pressed, when active, this will silence the microphone even if everything else is set up correctly.
Enable Permission to Use the Microphone in Safari
- Open Settings.
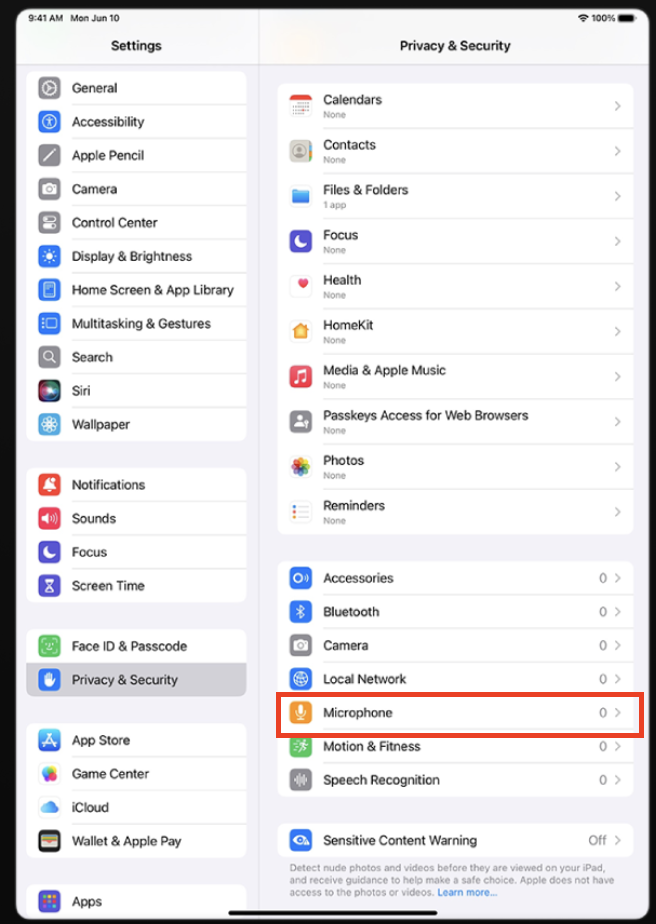
- Tap Privacy & Security (or Privacy on older iPads).
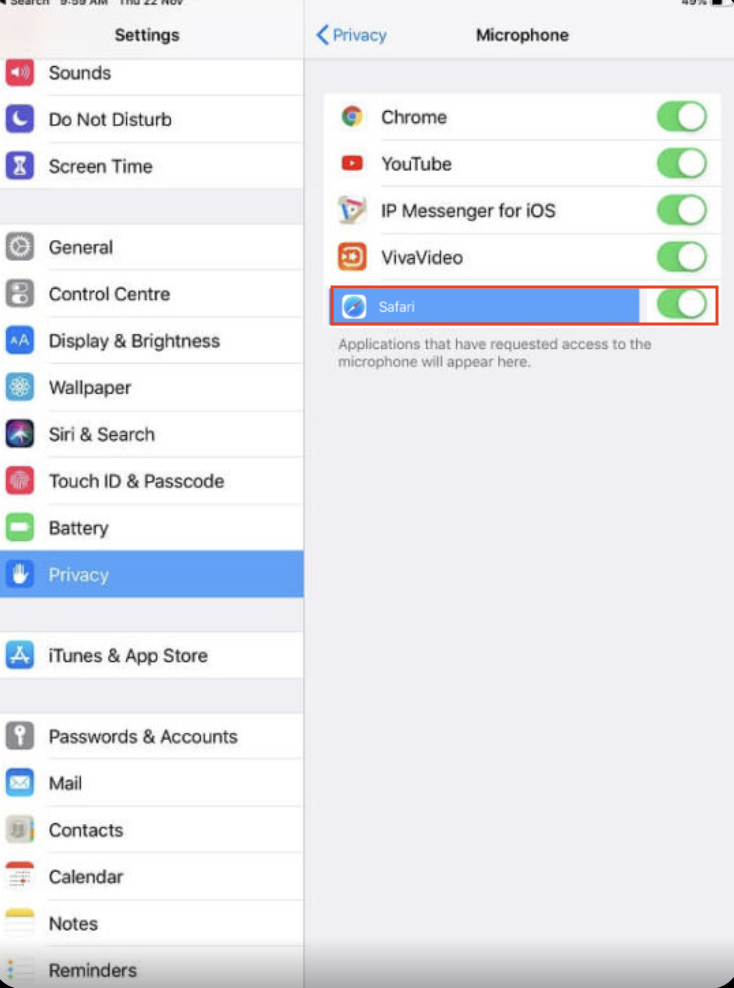
- Tap Microphone.
- Find Safari in the list and make sure the toggle is switched on (green).
Allow Websites to Use the Microphone in Safari
Safari does not have a built-in microphone selector. The microphone used is managed at the system level. When a website requests microphone access, Safari will use whichever microphone is currently active on the device.
- When a website asks for microphone permission, tap Allow.
- If permission was previously denied, go to Settings and search for Safari
- Click Microphone
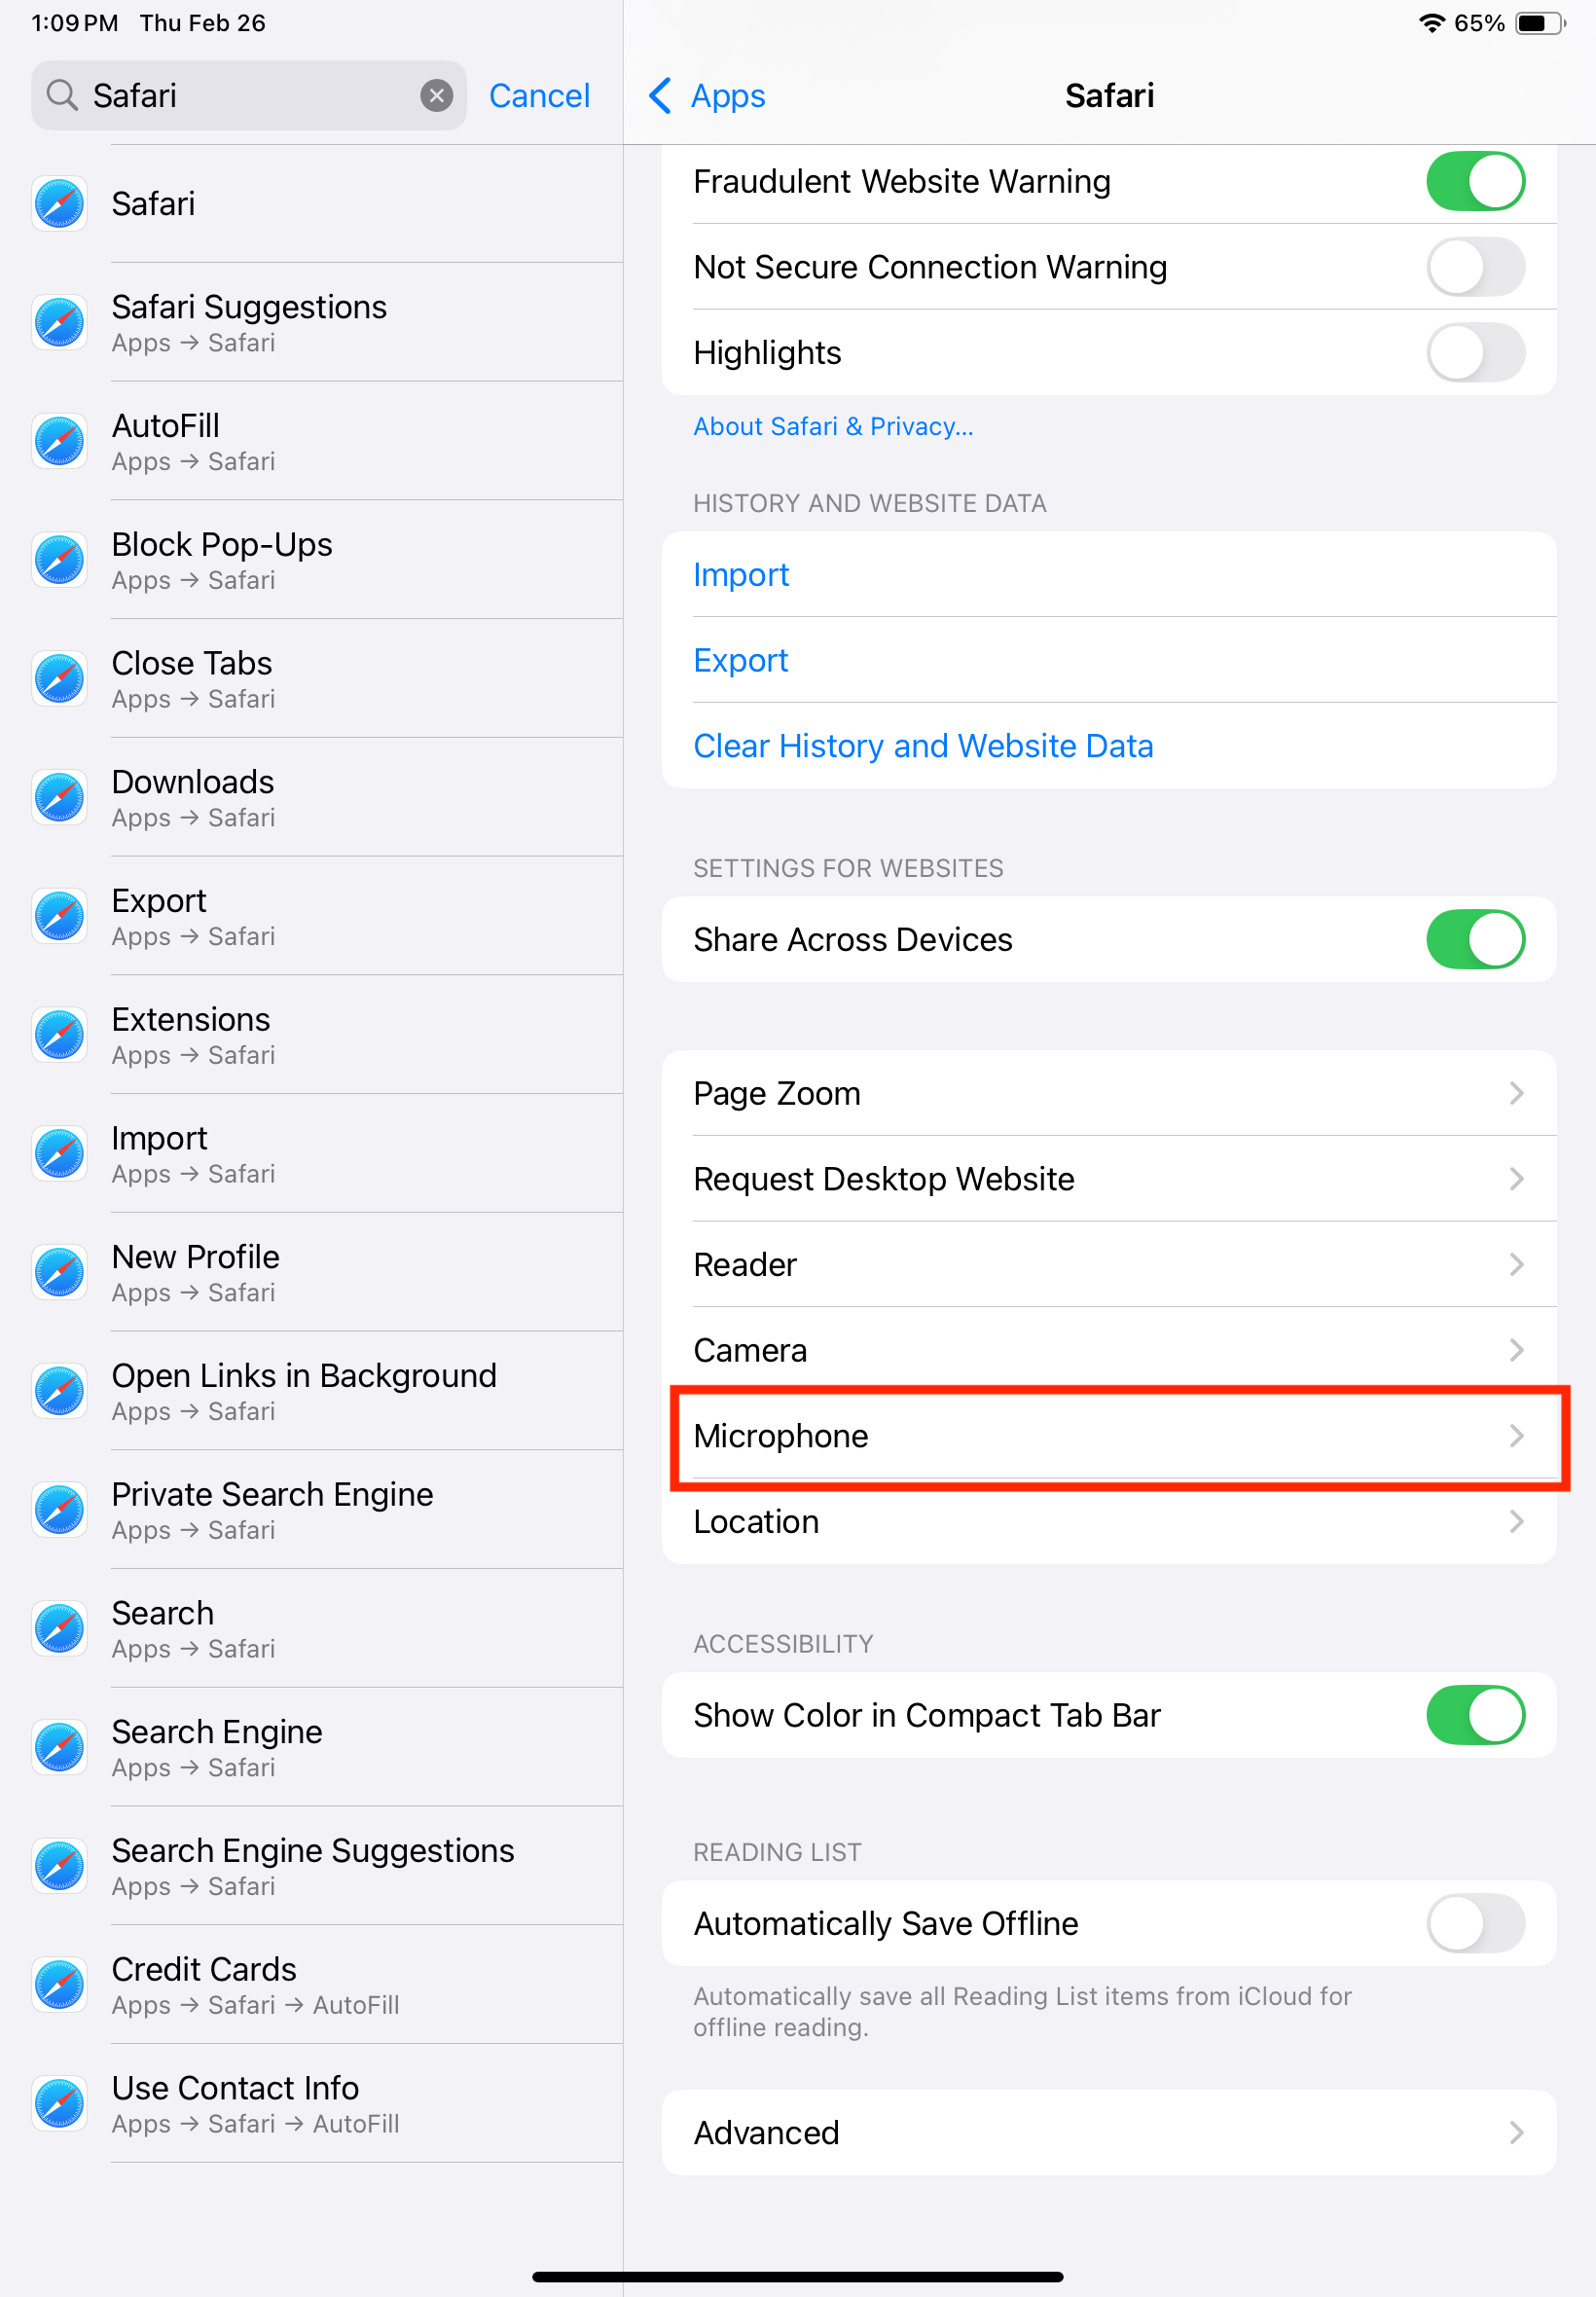
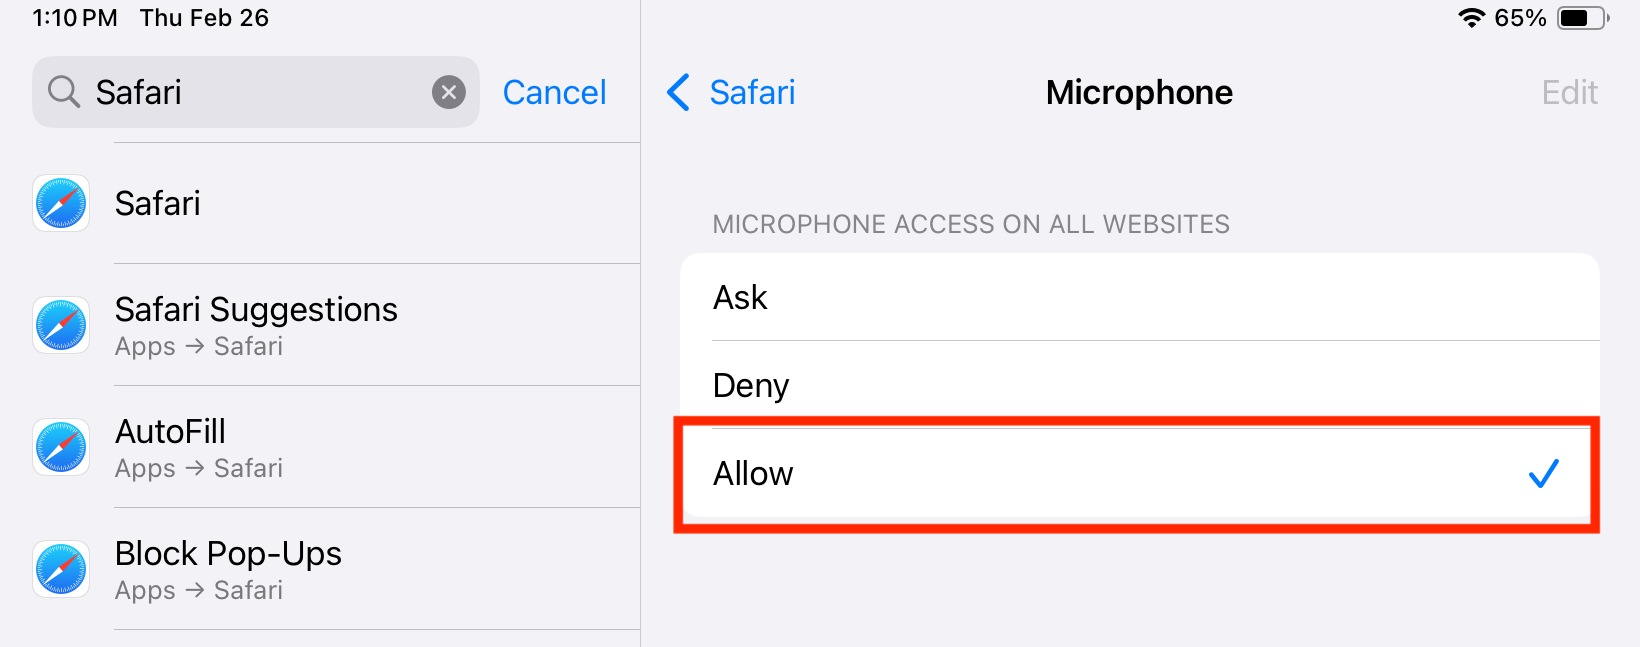
4. Set it to Allow or Ask
Switch to the device's internal microphone
If an external mic is connected and you want to switch back to the iPad's built-in microphone, simply unplug the headset, the iPad will switch back to the internal microphone automatically. For best results using the internal microphone, make sure there is nothing covering the microphone, including the iPad case.